Troubleshooting Power Automate issues

  1. Check any issues on Microsoft Power Automate at https://flow.microsoft.com/en-us/support/
  2. If the flow failed, check these tips: Go to the notifications icon at the top of the web portal, or selecting the “Activity” tab in the mobile app. You are now looking at the flow details. Find the step with the red exclamation icon and you should see the error message for your flow there.
  3. Identify specific flow runs: you may want to debug specific flow runs to confirm that your flow ran as expected. By default, the flow owner can look at the StartDuration, and Status columns in the run history view in Power Automate to help them identify the flow run they are interested in debugging.

To make it more efficient to identify flow runs when debugging, Power Automate provides the ability for flow owners to configure the list of columns that’s displayed on the run history page for each flow run.

  • Sign in to Power Automate.
  • Select My flows from the left side of the screen.
  • Select the flow for which you want to get more details.
  • Select Edit columns on the flow details page.

4. Identify the error

  • Select My flows.
  • Select the flow that failed.
  • In the 28-day run history section, select the date of the failed run.Details about the flow appear, and at least one step shows a red exclamation icon.
  • Open that failed step, and then review the error message.On the right pane, you can see the details of the error and How to fix the error.

5. Authentication failures: If you get the error message contains Unauthorized or an error code of 401 or 403 appears. You can usually fix an authentication error by updating the connection:

  • In the right pane, click on View Connections below How to fix.
  • Scroll to the connection for which you saw the Unauthorized error message.
  • Next to the connection, click or tap the Fix connection link in the message about the connection not being authenticated.
  • Verify your credentials by following the instructions that appear, return to your flow-run failure, and then click or tap Resubmit.

A user with SonicWALL admin rights cannot manage the Firewall

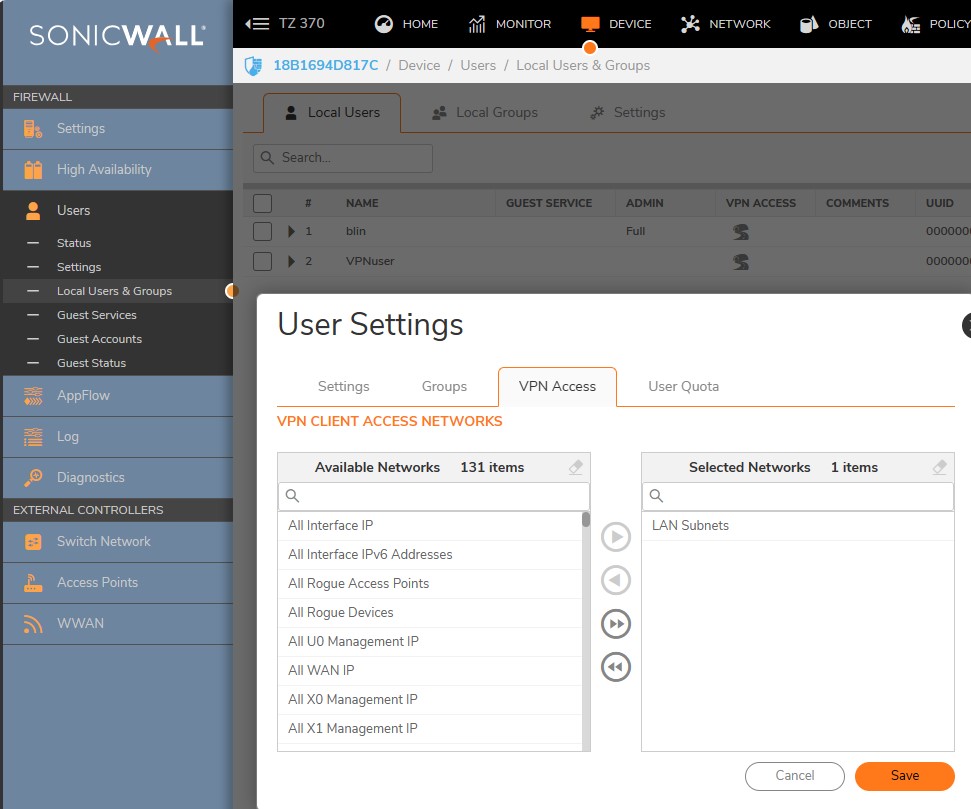
Situation: The client with admin right login their SonicWALL TZ370. However, He can’t manage the Firewall.

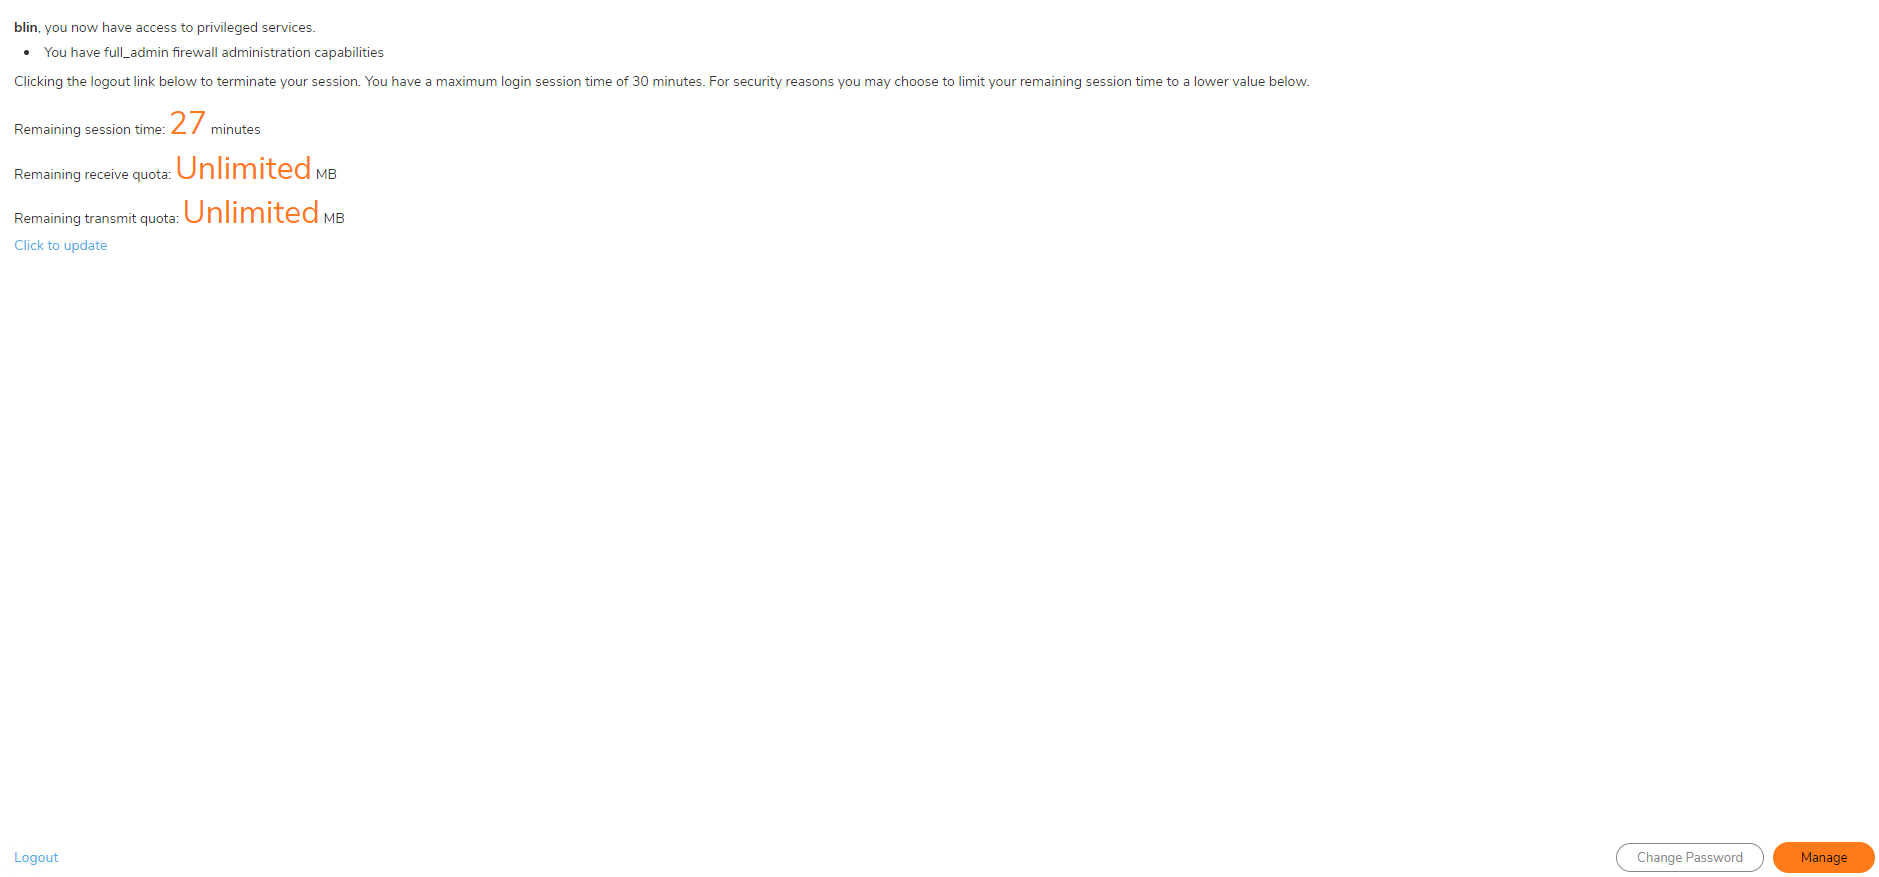
Troubleshooting: If Builtin admin is logged in the Firewall and another local user member of SonicWall Administrators group logged into the system, it won’t see the option to preempt the builtin admin account. When the local user member of SonicWall administrators group logged into the Firewall, and after successful authentication a pop up message is displayed and clicking the manage button display the following pop up with only “Non-config” login to the Firewall and also displays the information that an administrator is already logged into the Firewall.

Resolution: If multiple administrators are required to manage the Firewall and preempt each other then create two local users (admin1 and admin2 created for demonstration) and add them to SonicWall Administrators group, see screenshots below wherein one admin1 member of SonicWall Administrators already logged in to the Firewall and then admin2 member of SonicWall Administrators logged in from another interface and presented with preempt option.

admin1 already logged in with Config mode as shown in the screenshot below:

admin2 logged in from another location and presented with “Continue” option to preempt admin1, see screenshot below:Note: If the local user with admin was forced to logoff or ended session, it could be the admin login the Firewall.


SonicWALL: Error HTTPS User login not allowed from here

Situation: The client just added a new user as SonicWALL Administrator in their TZ370. However, the user can’t login with this error: HTTPS User login not allowed from here.

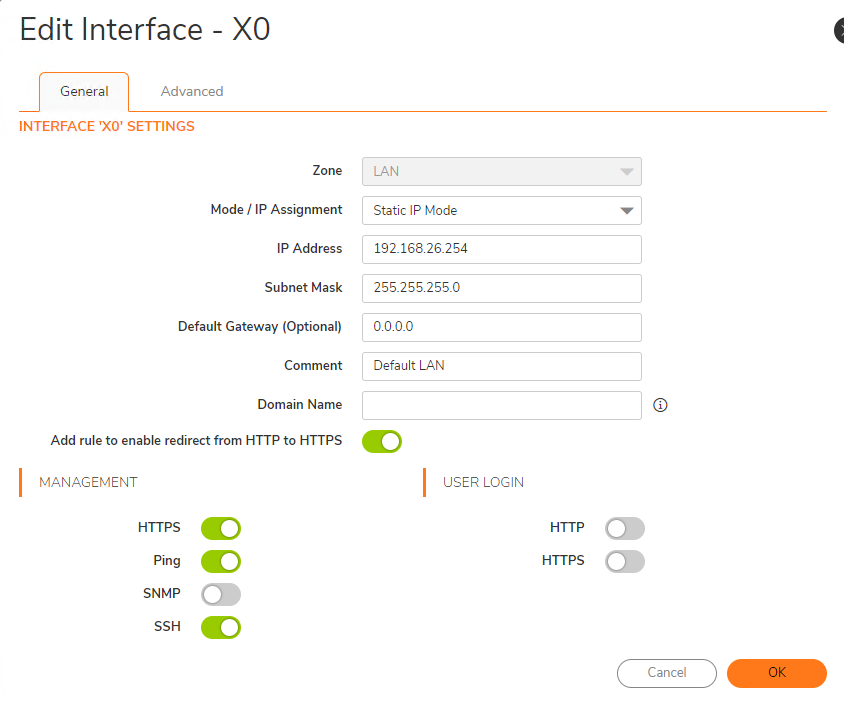
Resolution: Please check which firewall interface your client is connected to by  Login to the firewall with built in administration account. Navigate to Network | System | Interfaces, click Edit button of the interface your client connects to. Select HTTP or HTTPS at the User Login option.

If the HTTPS is off under USER LOGIN, turn it on.


SonicWALL Migration Tool: 500 Internal Server error

Case 1: Description: When attempting to Migrate a GEN5 configuraton file to a GEN7 settings file, the Migration tool throws an “Internal Server Error” on the browser and doesn’t provide a migrated settings file to us.

Cause: Global Bandwidth management not supported in GEN7 appliances. This is expected to be fixed in the upcoming release on Migration Tool v 4.35.1

Resolution: Disable BWM (Bandwidth Management) on the GEN6 Firewall and then export the settings file from the firewall to use in the Migration tool.

To disable BWM in your GEN6 Firewall, Please access the UI.

Go To Firewall Settings > Bandwidth Management > Set to NONE.

Save the configuration , Export the settings file from the firewall and then use this file as the source settings file in the Migration tool.

case 2: The client current SonicWALL uses 8090 as https port, which is different from default https port 443.

Resolution: changing the https port to 443 and export it and then use the Migration Tool to export it.

Note: You may have a problem if you change the https port. You may have two options. 1. change back the port to 8090. 2. Or re-configure the certificate and other related configuration.

Tools for Troubleshooting email issues

  1. Check your SPF here https://mxtoolbox.com/spf.aspx, most for error code 550.
  2. The diagnostic performs a large range of verifications. Contact Support. If none of these resolutions fix the error, create a new service request. Use the following description: “files upload failing to teams chat.” Attach the Teams desktop logs and a browser trace to the request.Self-help diagnostics for Microsoft Teams administrators

    3. Self helper tool for Microsoft 365: https://aka.ms/TeamsUploadFilesInChat

    This is an example, enter the problem under “How can we help?” and username or email. Then click on Run Tests.


Click the link to find the resolution 4.

Resolution 4

Error 1 can occur if the user doesn’t have permissions to the MySite host. To make SharePoint Online work as expected, all users who use OneDrive sites must have access to the MySite host. In order to restore default permissions to the MySite host site, use one of the following methods:

  • Navigate to the site permissions page in your tenant: https://contoso-my.sharepoint.com/_layouts/15/user.aspx, and grant Read permission to Everyone except external users.
  • Use SharePoint Online Management Shell to run the following cmdlets:
    PowerShell

    Connect-SPOService -Url https://contoso-admin.sharepoint.com/
    Add-SPOUser -Site https://contoso-my.sharepoint.com -LoginName "Everyone Except External Users" -Grou


You can’t reset your own password because password reset isn’t turned on for your account

Situation: When the user go to https://passwordresetmicrosoft.com to reset her password, she receives this message: You can’t reset your own password because password reset isn’t turned on for your account.

Resolution: Have your administrator to turn on self password reset for you. Please refer to this post:

How to enable reset office 365 password through self-service

No option to remove old email address from Email & accounts

Situation: The client would like to remove his old email address from Windows  11 Email & accounts, but he doesn’t see the option to do so.

Resolution:

Press Windows logo key + I, to open Settings.
Click on Accounts, and select Access work or school from the left pane.
Now, click on the email account and select Remove.


Old email address keeps popup after Microsoft tenant migration

Situation: The old email keeps popup after tenant migration. Microsoft Edge shows sing in.

Resolution 1: Remove the old email address from Account, Email & account, and Access work or school.

Resolution 2: Open Credentials Manger to remove the old email address.

Resolution 3: Delete the old email password from Microsoft Edge by going to Settings>profiles>Password.

Resolution 4: Clear browser data by going to Settings>Privacy, search and services.

Resolution 5: Delete the old email address from Registry.

Fixing “Files in web page are not in the expected location”

Situation: When opening outlook, you may receive a popup “Files in web page are not in the expected location”.

Resolution 1: When Outlook opens, click the folder in the menu that appears. After selecting Properties, go to the Home Page tab. The web page that Outlook is attempting to display will be disabled if the box labeled “Show home page by default for this folder” is unchecked.

Resolution 2: Problem resolved! The user added a Signature File with an image and subsequently deleted the image from the original folder. We created a new Signature File and the problem immediately resolved itself.