Fixing Laptop overheating

Laptop overheating is a common issue that can affect performance and longevity. Here are some solutions to help fix and prevent your laptop from overheating:

1. Ensure Proper Ventilation

  • Place on a Hard Surface: Use your laptop on a flat, hard surface to ensure proper airflow.
  • Elevate the Laptop: Use a laptop stand or cooling pad to lift the laptop and improve airflow underneath.

2. Clean the Vents and Fans

  • Regular Cleaning: Dust can accumulate in the vents and fans, blocking airflow.
    • Compressed Air: Use compressed air to blow out dust from the vents and fans.
    • Open the Laptop: If comfortable, open the laptop to clean the internal components. Ensure you follow the manufacturer’s guidelines.

3. Use a Cooling Pad

  • Cooling Pad: An external cooling pad can help reduce the temperature by providing additional fans and improved airflow.

4. Check for Obstructed Vents

  • Unblock Vents: Ensure vents are not blocked by objects like books, pillows, or your lap. Keep the area around the laptop clear.

5. Adjust Power Settings

  • Power Management: Adjust your laptop’s power settings to reduce heat production.
    • Windows: Go to Control Panel > Power Options and choose a balanced or power saver plan.
    • Mac: Go to System Preferences > Energy Saver and adjust the settings.

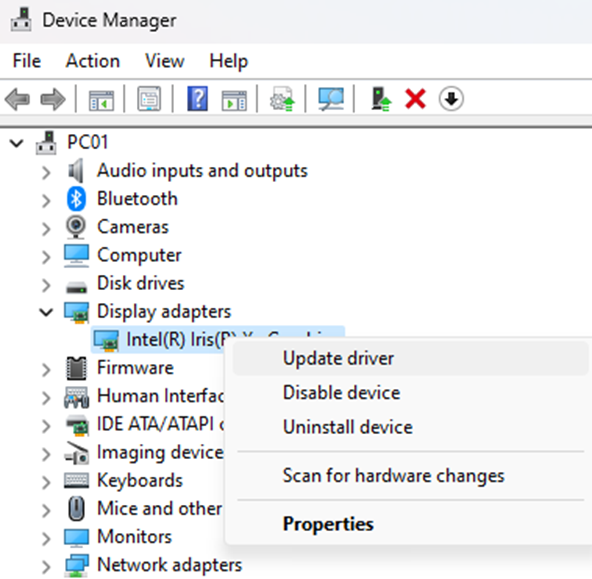
6. Update Drivers and BIOS

  • Update Drivers: Ensure all drivers, especially for the graphics card and chipset, are up to date.
    • Device Manager: Press Win + X and select Device Manager. Right-click on the devices and select Update driver.
    • Manufacturer’s Website: Visit the manufacturer’s website to download the latest drivers.
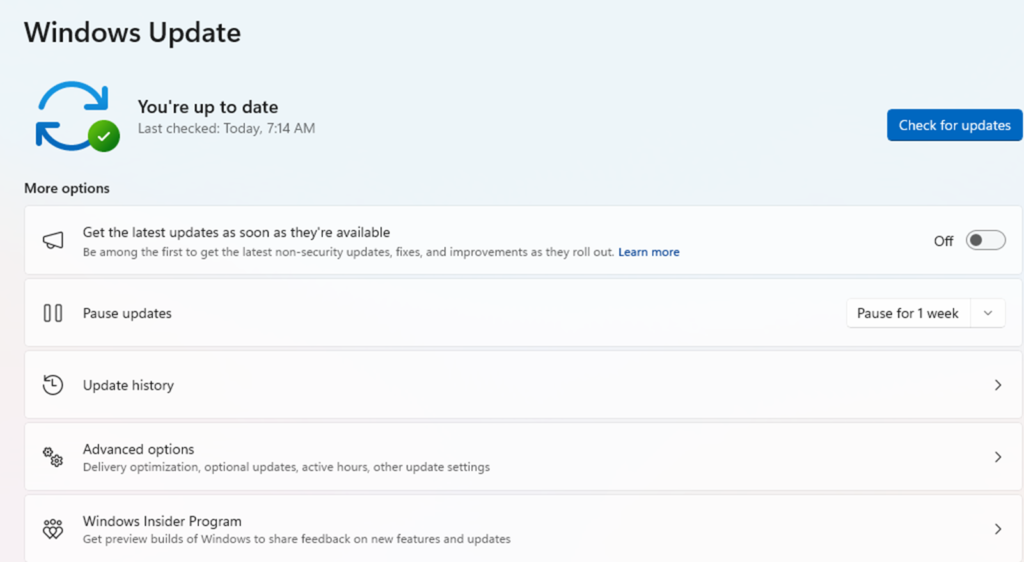
  • Update BIOS: Check the manufacturer’s website for BIOS updates, which can improve system stability and thermal management.

7. Limit Resource-Intensive Processes

  • Monitor CPU Usage: Use Task Manager (Windows) or Activity Monitor (Mac) to monitor CPU usage and close unnecessary programs.
    • Task Manager: Press Ctrl + Shift + Esc to open Task Manager. Go to the Processes tab to see which processes are consuming the most resources.
    • Activity Monitor: Press Cmd + Space, type Activity Monitor, and open it to check resource usage.

8. Improve Room Temperature

  • Ambient Temperature: Ensure the room where you use your laptop is cool and well-ventilated.
  • Use a Fan: A desk fan can help keep the area around your laptop cool.

9. Check for Malware

  • Malware Scan: Malware can cause high CPU usage, leading to overheating.
    • Use a reliable antivirus program to scan for and remove malware.

10. Replace Thermal Paste

  • Thermal Paste: Over time, the thermal paste between the CPU/GPU and the heatsink can dry out, reducing its effectiveness.
    • If comfortable, replace the thermal paste. Otherwise, seek professional help.

11. Modify Laptop Settings

  • Reduce Performance Settings: Lower the maximum processor state in power settings to reduce heat.
    • Windows: Go to Control Panel > Power Options > Change plan settings > Change advanced power settings. Under Processor power management, reduce the Maximum processor state.
    • Mac: Use the Energy Saver preferences to reduce performance settings.

12. Use Software Solutions

  • Fan Control Software: Use software to manually control fan speeds and monitor temperatures.
    • Windows: Programs like SpeedFan or HWMonitor.
    • Mac: Programs like Macs Fan Control.

13. Consider Professional Help

  • Technician: If you’re not comfortable opening your laptop or the above solutions don’t work, consider taking it to a professional technician for cleaning and maintenance.

Implementing these solutions should help in reducing your laptop’s overheating issues and improve its overall performance and lifespan.

Solutions to fix Battery draining quickly

Battery draining quickly can be a frustrating issue. Here are several solutions to help fix this problem on various devices, including smartphones, tablets, and laptops:

General Tips

  1. Reduce Screen Brightness
    • Lower your screen brightness to a comfortable level or enable adaptive brightness to automatically adjust based on ambient light.
  2. Shorten Screen Timeout
    • Decrease the screen timeout setting to ensure your screen turns off quickly when not in use.
  3. Disable Unnecessary Notifications
    • Turn off notifications for apps that you don’t need immediate updates from to save battery life.
  4. Turn Off Location Services
    • Disable GPS and location services when not needed, or set them to be used only when necessary.
  5. Update Software
    • Keep your operating system and apps up to date as updates often include battery optimizations and bug fixes.
  6. Check Battery Usage
    • Go to battery settings to see which apps are consuming the most power and limit their usage or uninstall them if not necessary.

For Smartphones and Tablets

  1. Enable Battery Saver Mode
    • Activate the built-in battery saver mode to extend battery life by reducing performance and limiting background data.
  2. Close Background Apps
    • Close apps running in the background to prevent unnecessary battery drain.
  3. Limit Background App Refresh
    • Disable or limit the background refresh for apps that don’t need to constantly update.
  4. Turn Off Wireless Services When Not in Use
    • Turn off Wi-Fi, Bluetooth, and mobile data when not needed.
  5. Disable Vibration
    • Turn off or reduce vibration for notifications and haptic feedback.
  6. Reduce Animations
    • Turn off or reduce animations and visual effects in the settings.

For Laptops

  1. Adjust Power Settings
    • Use power-saving modes like “Battery Saver” or “Power Saver” in your laptop’s power settings.
  2. Unplug Unnecessary Peripherals
    • Disconnect external devices like USB drives, external hard drives, and other peripherals when not in use.
  3. Manage Startup Programs
    • Disable unnecessary programs from starting up with your system, as they can run in the background and drain the battery.
  4. Turn Off Keyboard Backlighting
    • Disable or reduce the brightness of keyboard backlighting.
  5. Use Integrated Graphics
    • If your laptop has both integrated and dedicated graphics, use the integrated graphics for less demanding tasks to save power.
  6. Keep Your Laptop Cool
    • Ensure proper ventilation to prevent overheating, as high temperatures can reduce battery efficiency.

Additional Tips

  1. Replace the Battery
    • If your device is old, the battery might be degraded. Consider replacing the battery with a new one.
  2. Factory Reset
    • As a last resort, performing a factory reset can help if the battery drain is due to software issues. Ensure you back up your data before doing this.
  3. Seek Professional Help
    • If the problem persists, it might be a hardware issue. Contact customer support or visit a professional technician for further assistance.

Implementing these solutions should help improve your device’s battery life. Adjust the settings according to your usage patterns and needs for the best results.

Fixing PC blue screen with DPC WATCHDOG VIOLATION

The DPC_WATCHDOG_VIOLATION Blue Screen of Death (BSOD) error in Windows is typically related to driver issues, hardware incompatibility, or system file corruption.

Here are steps to troubleshoot and fix this issue:

1. Check and Update Drivers

  • Update Drivers: Outdated or corrupt drivers can cause this error. Make sure all your drivers are up to date, especially for critical components like the graphics card, network adapter, and storage controllers.
    • Device Manager:
      1. Press Win + X and select Device Manager.
      2. Right-click on each device and select Update driver.
    • Manufacturer’s Website: Visit the website of your PC or hardware manufacturer to download the latest drivers.

2. Check for Windows Updates

  • Update Windows: Ensure your Windows is up to date, as updates often include fixes for known issues.
    • Go to Settings > Update & Security > Windows Update.
    • Click Check for updates and install any available updates.

3. Run System File Checker (SFC) and DISM

  • System File Checker: This tool scans for and repairs corrupted system files.
    1. Open Command Prompt as Administrator.
      • Press Win + X and select Command Prompt (Admin) or Windows PowerShell (Admin).
    2. Type sfc /scannow and press Enter.
    3. Wait for the scan to complete and follow any on-screen instructions.
  • DISM: This tool repairs the Windows image.
    1. Open Command Prompt as Administrator.
    2. Type the following commands one by one and press Enter after each:
      • DISM /Online /Cleanup-Image /CheckHealth
      • DISM /Online /Cleanup-ImageType sfc /scannow and press Enter /ScanHealth
      • DISM /Online /Cleanup-Image /RestoreHealth
    3. Restart your computer after the process completes.

4. Check Disk for Errors

  • CHKDSK: This utility checks for disk errors and fixes them.
    1. Open Command Prompt as Administrator.
    2. Type chkdsk /f /r and press Enter.
    3. Follow the prompts to schedule a scan on the next restart.
    4. Restart your computer to allow CHKDSK to run.

5. Check Hardware Compatibility and Connections

  • Hardware Compatibility: Ensure all connected hardware is compatible with your system and Windows version.
  • Check Connections: Make sure all internal and external hardware components are properly connected.

6. Disable Fast Startup

  • Fast Startup: Sometimes, fast startup can cause issues.
    1. Go to Control Panel > Power Options.
    2. Click Choose what the power buttons do.
    3. Click Change settings that are currently unavailable.
    4. Uncheck Turn on fast startup.
    5. Click Save changes and restart your computer.

7. Update Firmware and BIOS

  • Update Firmware: Check for firmware updates for your SSD or other hardware components.
  • Update BIOS: Ensure your BIOS is up to date. Visit the manufacturer’s website for instructions and updates.

8. Perform a Clean Boot

  • Clean Boot: This helps identify if a startup program is causing the issue.
    1. Press Win + R, type msconfig, and press Enter.
    2. Go to the Services tab, check Hide all Microsoft services, and click Disable all.
    3. Go to the Startup tab and click Open Task Manager.
    4. Disable all startup items.
    5. Close Task Manager and click OK in the System Configuration window.
    6. Restart your computer.

9. Reset Windows

  • Reset Windows: If all else fails, consider resetting Windows to its default state.
    1. Go to Settings > Update & Security > Recovery.
    2. Under Reset this PC, click Get started.
    3. Follow the prompts to either keep your files or remove everything.

By following these steps, you should be able to resolve the DPC_WATCHDOG_VIOLATION error and prevent it from recurring. If the problem persists, it might be worth consulting a professional technician.

Pease view this step by step video:

WordPress can’t be found after transferring to different host

The client just transferred their WordPress website to a new hosting provider and installed WordPress. The administrator can access the WP-Admin page, but no one can access the WordPress default page, receiving the error: “Oops! That page can’t be found.”

To troubleshoot this issue, please follow these steps:

Step 1: Ensure all WordPress files are uploaded to the new hosting server.

Option 1: You can use FTP or SFTP client download and then upload all files to the new hosting.

Option 2: You can use WordPress Plugins to export and then import those files.

Option 3: You can use the backup and restore feature for your website.

Normally, the backup feature is located in the hosting control panel, often referred to as cPanel or a similar interface. The exact location and availability of this feature depend on your hosting company.

Step 2: Verify that you have created the database in the new hosting’s MySQL Database.

Also create a MySQL User.

The MySQL feature is located in the hosting cPanel.

Step 3: Use phpMyAdmin to import the new Database.

Again, The phpMyAdmin feature is located in the hosting cPanel.

Step 4. Reconfigure the wp-config.php file to match the new database name, username, and password.

Now, your visitors should be able to access the WordPress in the new hosting.

Please view this step by step video:

Making a Conference Call in ShoreTel Phone

To conference a party into a connected call:
Step 1 Press the Conference button . The call is put on hold.
Step 2 Dial the extension of the party you would like to conference.
Step 3 Press the Confrn soft key to ring the party directly. or Dial the number and press the Conslt soft key to speak with the recipient before ringing him or her into the conference call. After consultation, press the Yes soft key to complete the conference call, or press the Cancel soft key to return to the original two-party call.
Step 4 Repeat to add additional parties.

After a conference is established, you can use the Show soft key to display all
conferenced parties. If you wish to disconnect a party, scroll to the party’s
entry and press the Drop soft key.