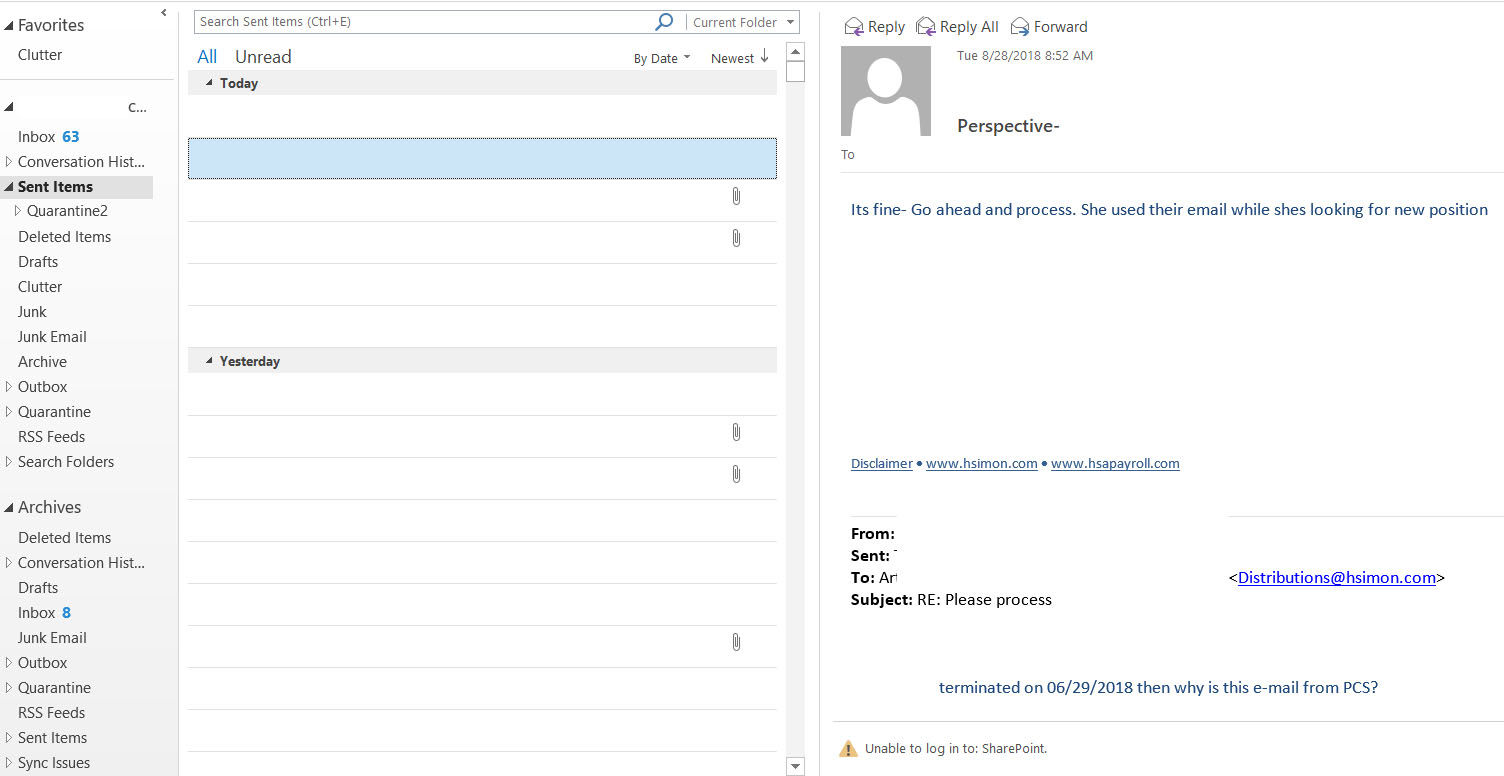
The user is using Outlook 2013. When she clicks on Sent Items folder, it doesn’t show the sent information (you can read the sent email. as shown in the screenshot.
The user is using Outlook 2013. When she clicks on Sent Items folder, it doesn’t show the sent information (you can read the sent email. as shown in the screenshot.
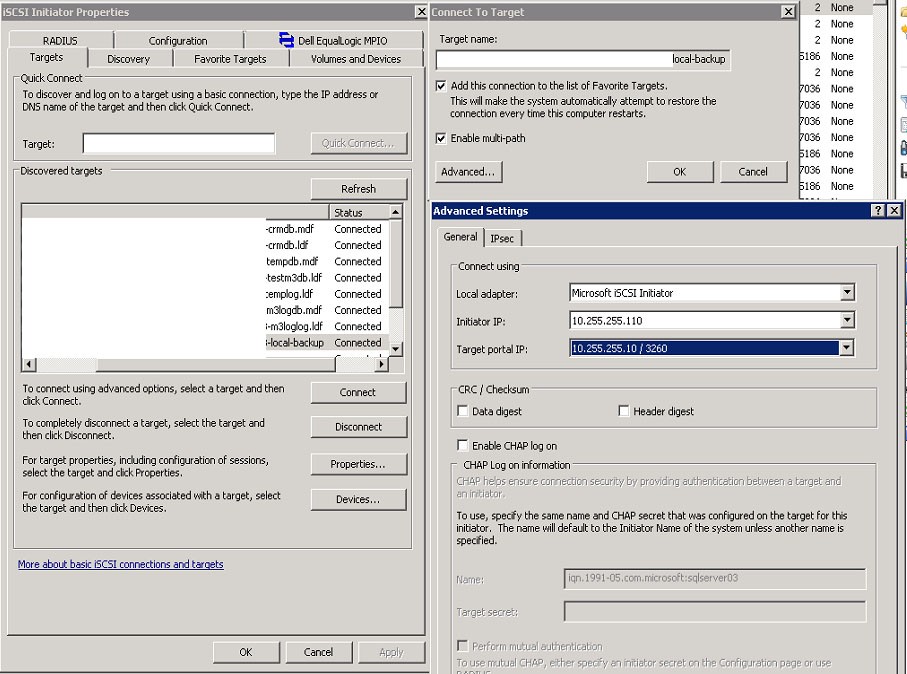
In this example, our server has 2 NICs connecting to EqaulLogic SAN. We would like to add one more NIC connection to target SAN. Here is how.
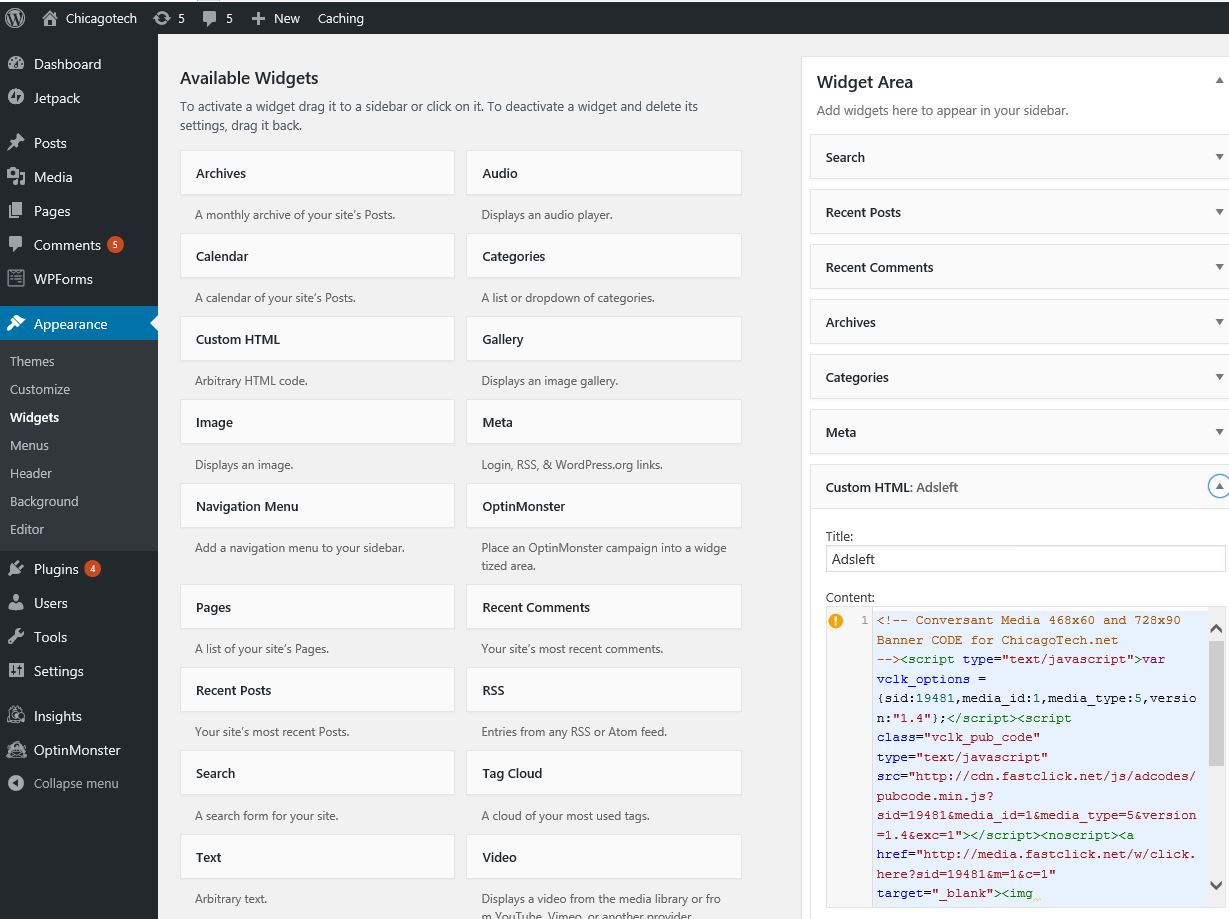
In this example, we will show you how to add ads on the left sidebar using Widget Custom.
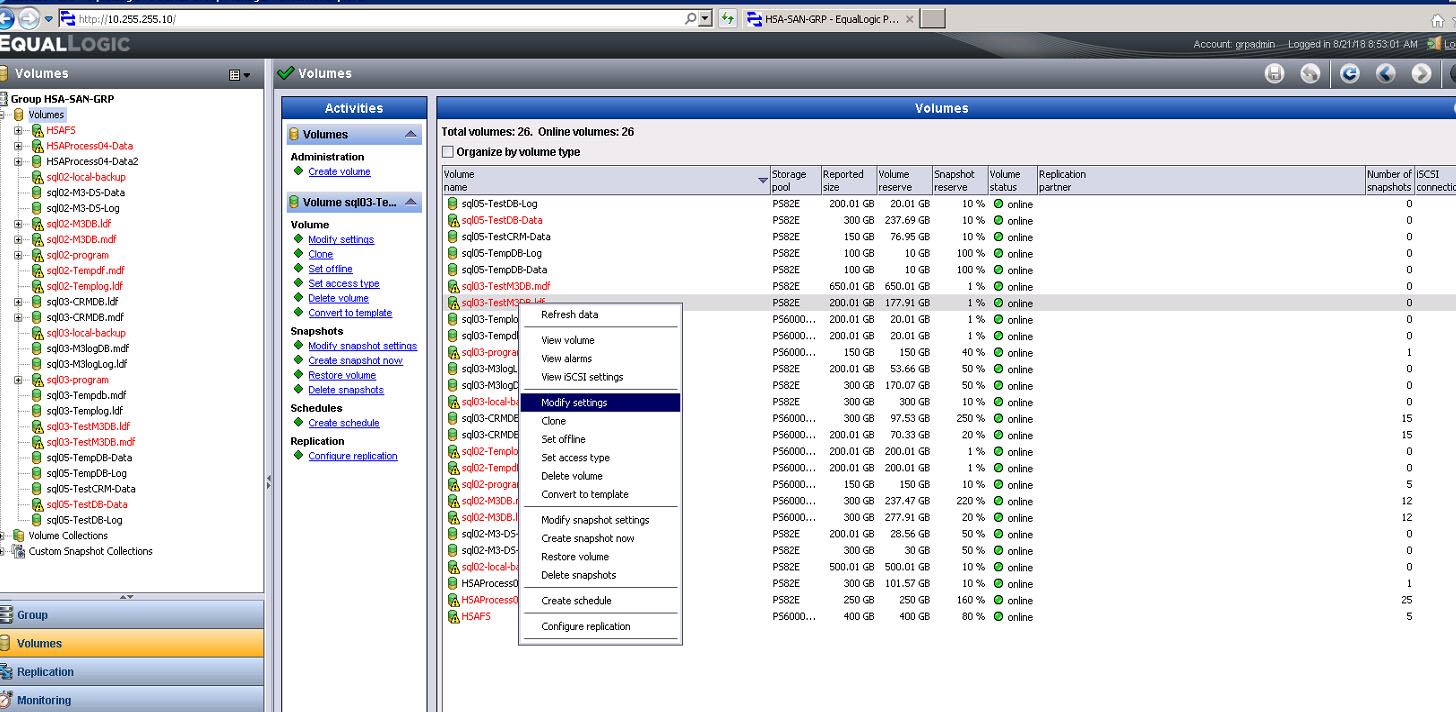 3. in General, you can change the Storage pool assignment.
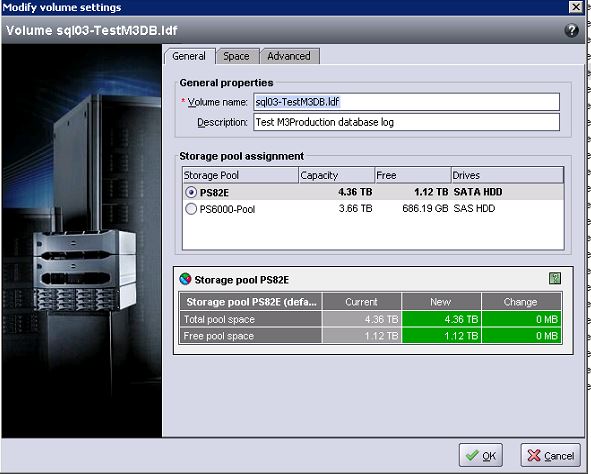
4. Click Spaces to change the Volume size.
5. Click Advanced to change or copy iSCSI target, or setup Volume RAID preference.
Situation: the client has a SQL server 2008 R2. They had a problem to access some of database. There are some Events:
Event ID: 823
Description:
The operating system returned error 21(The device is not ready.) to SQL Server during a read at offset 0x00000000322000 in file ‘R:\MSSQL\HSADB DATA\M846_Sub.mdf’. Additional messages in the SQL Server error log and system event log may provide more detail. This is a severe system-level error condition that threatens database integrity and must be corrected immediately. Complete a full database consistency check (DBCC CHECKDB). This error can be caused by many factors; for more information, see SQL Server Books Online.
Troubleshooting: The Database is located in EqaulLogic SAN. There are 4 NICs connecting to the SAN. However, EqualLogic SAN Management shows there are only two are active.
<
Situation: The client has an Azure AD DirSync server version 1.1.819.0 running on Windows server 2012 r2. After installing the latest cumulative Windows Update patch, the server is experiencing high CPU issues being used by the “Azure AD Connect Health Sync Monitor”
Resolutions 1. Install the latest version (1.1.880.0) of Microsoft Azure Active Directory Connect.
2. If for some reasons you can’t install the new version, stop the Azure AD Connect Health Sync Monitor Service. Here is how:
3. Uninstall the KB4338814 Windows Update. The next option is to uninstall the Windows Updates that caused the problem. In my case, it was the KB4338814 “2018-07 Cumulative Update for Windows Server”. Some other people have reported success by uninstalling any or all of these updates: KB4103725, KB4096417, KB4095875, KB4054566, KB4338815, KB4338419, KB4340558, KB4338605, KB4339093, KB4340006, or KB4338824.
•Click on Start and go to Settings
•Go to Windows Update
•Go to Update History
•Click on Uninstall Updates
•Find the KB updates you want to uninstall
•Click on the update then click Uninstall
Uninstall .NET Framework 4.7.2 Update
Situation: The client has a server running Windows 2008 R2 server. Whenever they restart the server, it shutdown but never comes back. They need to turn it off manually and then turn it on. In other words, warm reboot doesn’t. It works only cool reboot.
Troubleshooting: We find there is a dead USB drive connecting to the server. Removing it from the server fixes the problem.
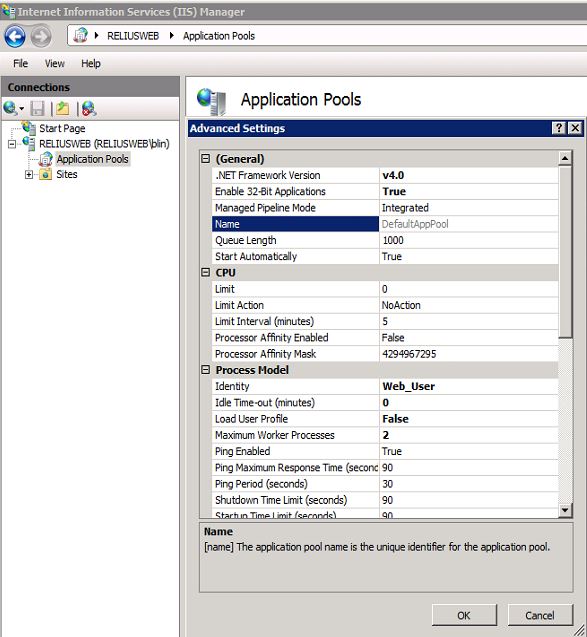
Q: We are running RA 2017.3. We are having a problem with our RA Web site going down for no reason. No log information amd restarting IIS doesn’t help either. We need to do a total server restart. Any ideas on what we can do?
A: Change Maximum Worker Processes to 2 and lets see if that helps. To do that, please open IIS. Navigate to Server name>Application Pools>Advanced Settings, change Maximum Worker Processes to 2.
Situation: the client tries to clone his Laptop Windows 10 with HDD disk to a SDD disk. However, it gets Windows Recovery blue screen with error code 0x000000e.
Resolution: Restore BCD by downloading and creating the disc image from Microsoft. Boot from windows installation media/command prompt and execute: bootrec /rebuildbcd.