Q: We have DYMO LableWriter 450 printer. It works until we changing the label. Why?
Chicagotech.net: The DYMO label back has a mark. If you put label incorrect way, it doesn’t print. Make sure the Label mark is on the back side.
Q: We have DYMO LableWriter 450 printer. It works until we changing the label. Why?
Chicagotech.net: The DYMO label back has a mark. If you put label incorrect way, it doesn’t print. Make sure the Label mark is on the back side.
File History is a built-in tool that was first introduced in Windows 8 and it allows you to recover files you might have accidentally deleted, or restore a modified document to an earlier version.
To use it, you’ll need an external hard drive or a large capacity USB flash drive. You can set it up to use a network location, too. File History will automatically back up Favorites, Contacts, Desktop items, and more.
File History is turned off by default. To turn on and Configure File History, type: file history into the search box and hit Enter or select it from the results at the top.
Q: One of our users has a blue screen problem. In the past couple days, when he opens a word document, the windows crashes with a blue screen, and then restart the windows.
chicagotech.net Assuming he is running windows 10, it could the Windows update issues. Check the status of Windows updates and install the latest updates .
Q: We created a conference room in Office 365 resources and assigned permissions to everyone. However, Users can’t see the calendar. Why?
chicagotech.net: The user may need to open it first. Go to Calendar>Files>Open another calendar.
Q: My Outlook shows 1 unread message. However, I can’t read it in reading panel. Why?
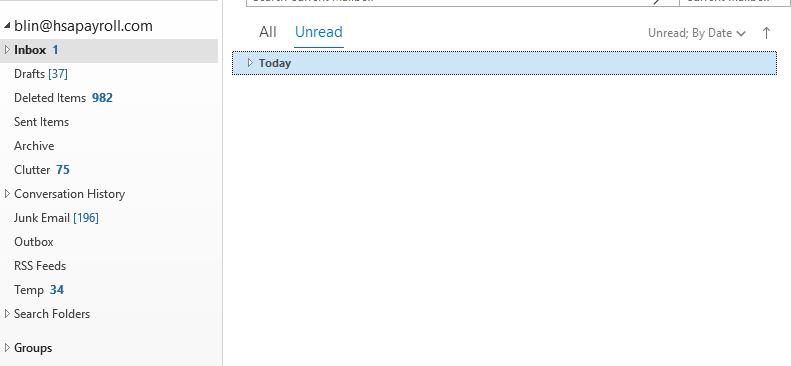
Chicagotech.net: It is hind in the Today. Click Today, you should see the email.
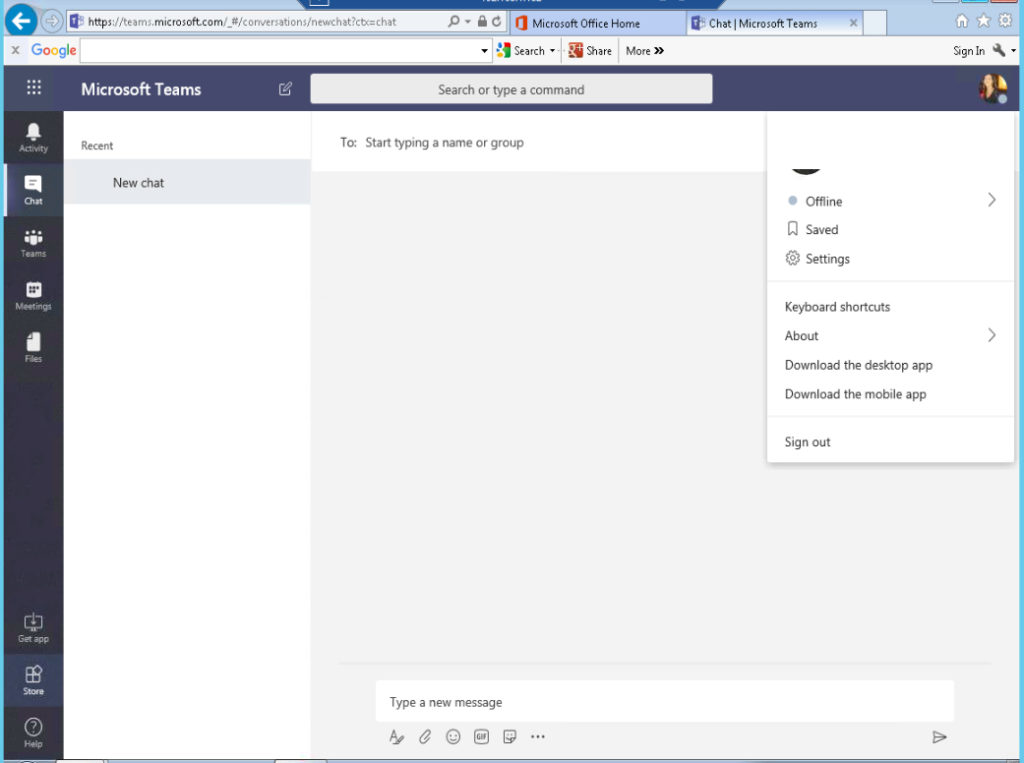
Q: After we received a Microsoft Email about join Microsoft Team and we did, we can’t use Skype any more. It is offline. How can we fix it?
www.Chicagotech.net: Since you have switched Skype to Team, you may need to download and use Team. Login Office 365, click on Team icon to install it.
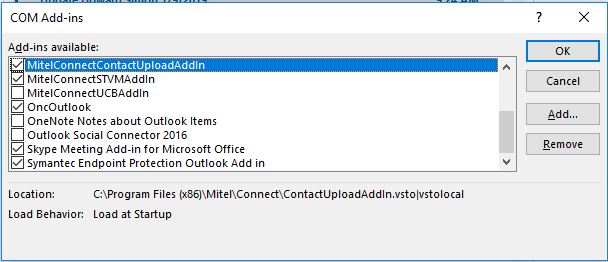
Q: We use office 365 and some of Outlook don’t show Skype icon in Meeting. Why?
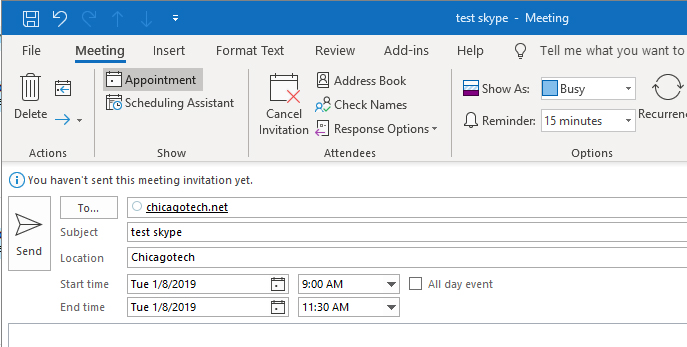
Chicagotech.net: In most cases this is Add-ins issue. Go to Files>Options>Add-ins. Make sure Skype meeting Add-In for Microsoft Office is enabled.
After that, you should see Skype Meeting icon.

Q: We are configuring Palo Alto Firewall. We have a problem to setup SMTP to send a notification. We use Microsoft office 365 and put smtp.office365.com server name. However, it doesn’t work and it return with an error message.
Chicagotech.net: smtp.office365.com is Microsoft 365 standard smtp server. However, for security reason, you may want to use protection SMTP server name. It looks lime this format: chicagotech-net.mail.protection.outlook.com.
Q: We have Sharp MX-6070 multiple function printer/scan/copy. We have a problem to setup SMTP to scan to email. We use Microsoft office 365 and put smtp.office365.com server name. However, it doesn’t work and it return with an error message.
Chicagotech.net: smtp.office365.com is Microsoft 365 standard smtp server. However, for security reason, you may want to use protection SMTP server name. It looks this format: chicagotech-net.mail.protection.outlook.com.
Situation: The client tried to send invitation to one of his friend for joining a Yahoo group. He received this message: Unable to send an invitation to a member who requests one
Resolution: The receipt needs to enable allow receive invitation in his Yahoo email preferences. This how to may help: