Media create tool receives this error code 0x80070003 – 0xA001B


  • Resolution1:If you are receiving this error message on your device when using the Media Creation tool, the only option available is to retry the process until it works (slim chance). The only other working solution that will solve this problem is to create your Windows installation media using a different computer.
  • Resolution2:Resetting the Windows Update Components to fix the error code 0x80070003 with the KB5007186 update.
  • Resolution 3:Suggests clearing storage space in C: Drive on your system to fix the issue.
  • Resolution 4: Resetting the entire Windows Update component if the error is due to corrupted Windows Update dependencies. If the Windows Update component is malfunctioning, quick fixes include using Microsoft Update Catalog, the Media Creation Tool, or the Windows Update Assistant.
  • Resolution 5: Disabling CSM and enabling Secure boot if not and trying again. Others suggest downloading an ISO file from Microsoft servers and using Rufus to create an Installation media.

Can’t setup email after tenant migration with AADST50020

Situation: After migrating Microsoft tenant, some users can’t setup their email with this message; Sorry, we’re having trouble signing you in. AADST50020…

Troubleshooting: It could be the cache issue.

Resolution 1: Clean the email account cache.

Resolution 2: Remove and re-add Outlook app.

Go to Settings>App>Outlook, tap

Uninstall


Fixing 550 5.7.64 TenantAttribution; Relay Access Denied

Situation: After migrating Micrsoft tenant using Quest-on-demand, the client can’t send email to gmail with this error message:

550 5.7.64 TenantAttribution; Relay Access Denied [ValidationStatus of ‘CN=chicagotech.net’ is CertificateExpired] [AM7EUR03FT021.eop-EUR03.prod.protection.outlook.com 2023-10-05T14:05:40.792Z 08DBC59CBFCC3CE2]

Troubleshooting: When migrating Tenant, the client creates temporary certificates for Quest-on-demand on their DNS record. 

chicagotech.net. 60 IN MX 0 bt-esg-uksouth-1-1.odmad.quest-on-demand.com.

chicagotech.net. 60 IN MX 0 bt-esg-uksouth-1-2.odmad.quest-on-demand.com.

We find the quest on demand server is on the relay outbound by going to Exhange admin center under Mail flow Connectors, 

The resolution is disabling BT-IntegrationPro-Out… in Rules whch fixes the problem.


Azure account doesn’t sync with Microosft edge

Situation: The client login her Windows 11 using Azure account. However, Microsoft Edge doesn’t sync.

Troubleshooting 1: If a user is experiencing a sync issue, they might need to reset sync in Settings > Profiles > Sync > Reset sync.

Troubleshooting 2: Try to sign out and then sign in.

troubleshooting 3: Go to edge://sync-internals.

Troubleshooting 4: Try pinging the server endpoint.

Troubleshooting 5: If the server endpoint is empty, or if server can’t be pinged because there’s a firewall in the environment, confirm that the necessary service endpoints are available to the client device.


The Mobile Device Management (MDM) server failed to authenticate the user with Error code: 80180002

Situation: When using Windows 11, you may keep getting this message: The Mobile Device Management (MDM) server failed to authenticate the user with Error code: 80180002

Causes:

  • Insufficient permissions – Your organization manages most work Microsoft 365 accounts. This is usually because of some security settings. So while the account may belong to you, you are somewhat restricted in how you manage it.
  • Wrong configurations – If your device or account does not meet the prerequisites to join Azure AD, your account may be denied access.
  • Network change – If the user’s account is linked with a Microsoft account, it’s possible that the user has changed their network, and you need to link them with the correct Azure AD tenant again.
  • Device not on MDM – MDM is a security policy that determines the devices that can access Azure. If your device is not enrolled in Mobile Device Management (MDM), you might get the error 80180002.

Resolution 1: Add the account to your device

  1. Hit the Windows key and click on Settings.
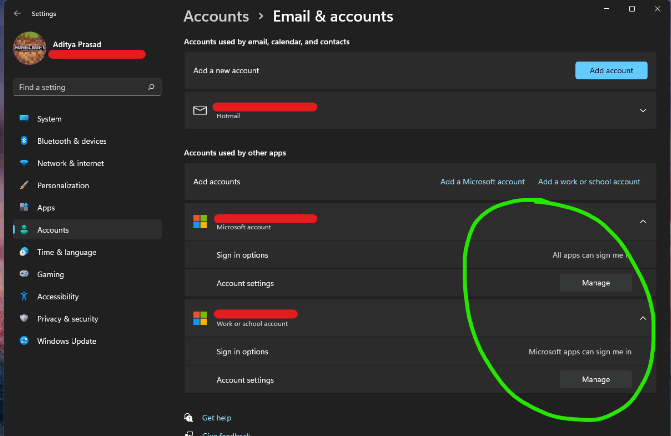
  2. Click on Accounts on the left pane, then select Access work or school.
  3. Locate the account you’re trying to log in using, then disconnect it.
  4. Wait for a few moments, then add the account again

Resolution 2: Disable conditional access

  1. Sign in to your Azure account.
  2. Click on the Menu at the top left corner and select Azure Active Directory.
  3. Select Protect & secure on the left pane, then click on Conditional Access.
  4. Under the Access policy option, toggle it off.
  5. Azure AD conditional access allows you to control access to your applications and data based on the location of your users, their identity, and their device. When you disable this option, you allow users to join with any device without restrictions.

Resolution 3: Remove the account credentials

  1. Hit the Windows Search icon, type Credential Manager in the search bar, then click Open
  2. Click on Windows Credentials.
  3. Select MicrosoftAccount, click on it to expand, then hit Remove.
  4. You’ll get a command prompt asking you to confirm whether you want to remove the credentials, so click Yes.

Resolution 4: Change MDM and MAM settings

  1. Sign in to your Azure account.
  2. Click on Azure Active Directory under Azure services.
  3. Select Mobility (MDM and MAM) on the left pane
  4. Click on Microsoft Intune under Mobility (MDM and MAM).
  5. Find MDM user scope and MAM user scope options, set them to None then, click on Save.

Troubleshooting 5: Clear Microsoft Store Cache

To clear the Microsoft Store cache, follow these steps:

Press the Windows key + R to open the Run dialog box.

Type “wsreset.exe” (without the quotes) and press Enter.

Wait for the command to complete, and then restart your computer.

Try installing or updating Microsoft Office or any of its applications again.

Teams: Sorry you need OneDrive for Business to share files

Situation: When the user tries to use Microsoft Teams to attach a file, he gets this error:  “Sorry you need OneDrive for Business to share files. See your admin about getting a license”

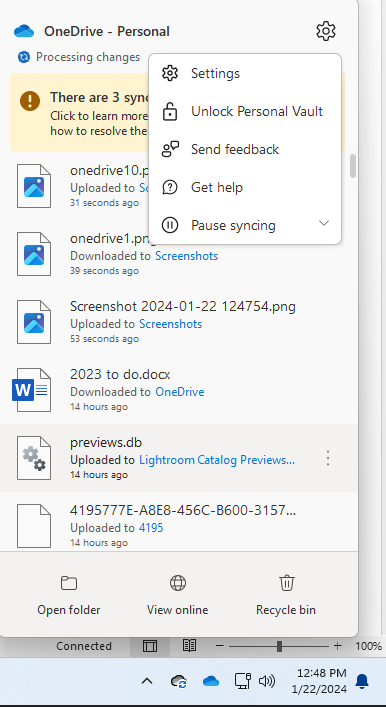
Troubleshooting 1:  it could be OneDrive sync issue. You just need to sync OneDrive and use. There is the method about syncing OneDrive: Right-Click OneDrive in the tray to resovle the issue.

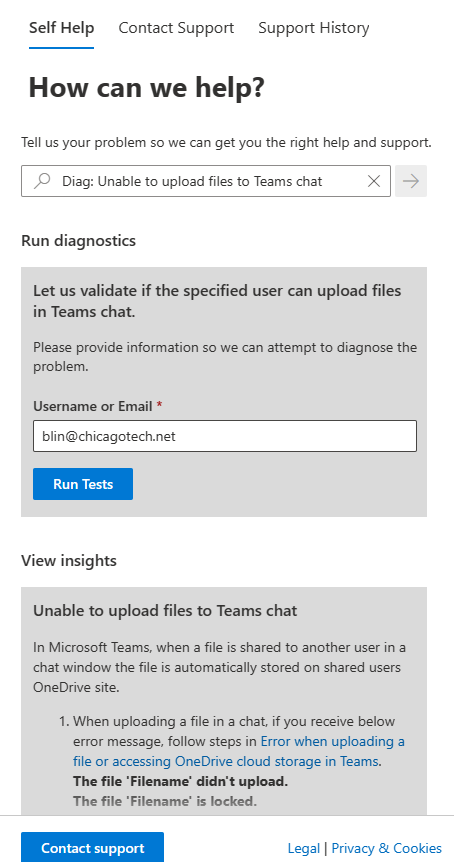
Troubleshooting 2: Run a Microsoft self-diagnostics tool – Error when uploading files to a Teams chat – Microsoft Teams | Microsoft Learn

Click on

Run Tests: Unable to upload files to Teams chat

Enter your Microsoft email address blin@chicagotech.net n our example  and then click Run Tests.

If it finds a problem, it may give you a suggestion. In our example, we do see the error 1. This is the resulotion:

Resolution 4
Error 1 can occur if the user doesn’t have permissions to the MySite host. To make SharePoint Online work as expected, all users who use OneDrive sites must have access to the MySite host. In order to restore default permissions to the MySite host site, use one of the following methods:

For example, go to my sharepoint at

https://chicagotech-my.sharepoint.com/_layouts/15/user.aspx

Highlight Everyone except external users and then click on Edit User Permissions.

Check Read – Can view pages and lists item and download documents. Click OK to save the settings.

  • Use SharePoint Online Management Shell to run the following cmdlets:

Connect-SPOService -Url https://contoso-admin.sharepoint.com/

Add-SPOUser -Site https://contoso-my.sharepoint.com -LoginName “Everyone Except External Users” -Group Visitors

For example, Connect-SPOService -Url https://chicagotec-admin.sharepoint.com/

Login using your admin account.

Add-SPOUser -Site https://chicagotech-my.sharepoint.com -LoginName “Everyone Except External Users” -Group Visitors

Troubleshooting 3: Make sure the LockState of the OneDrive site of the affected user is set to Unlock status

Please run the command below in your SPO Management Shell again.

Get-Sposite <OneDrive URL> |fl

For example,

Get-Sposite https://chicagotech-my.sharepoint.com/personal/boblin_chicagotech_net |fl


Can’t add email address after Tenant Migration with this message: Something went wrong and Outlook couldn’t set up your account

Situation: The client is in processing to migrate their Micrsoft Tenant. After the migration, they can’t add the email address to Outlook with this message:  Something went wrong and Outlook couldn’t set up your account

Troubleshooting 1: Make sure you have transferred DNS MX record and Autodiscover works fine. If you just moved  the DNS MX record, you may wait for a couple hours.

If the web service provider or web hosting provider is unable to resolve it, take the following action:

  • Create Outlook registry keys to exclude the Last Known Good settings, HTTPS root domain, and the SRV record as detailed below. Once the registry entries are in place, restart Outlook and try to add the account or create a new profile again.
    • UseExcludeLastKnownGoodUrl to prevent Outlook from using the last known good AutoDiscover URL
      HKEY_CURRENT_USER\Software\Microsoft\Office\x.0\Outlook\Autodiscover
      DWORD: ExcludeLastKnownGoodUrl
      Value: 1ORHKEY_CURRENT_USER\Software\Policies\Microsoft\Office\x.0\Outlook\Autodiscover
      DWORD: ExcludeLastKnownGoodUrl
      Value: 1
    • Use ExcludeHttpsRootDomainto prevent Outlook from using the HTTPS root domain
      HKEY_CURRENT_USER\Software\Microsoft\Office\x.0\Outlook\Autodiscover
      DWORD: ExcludeHttpsRootDomain
      Value: 1ORHKEY_CURRENT_USER\Software\Policies\Microsoft\Office\x.0\Outlook\Autodiscover
      DWORD: ExcludeHttpsRootDomain
      Value: 1
    • Use ExcludeSrvRecordto prevent Outlook from using the HTTPS root domain
      HKEY_CURRENT_USER\Software\Microsoft\Office\x.0\Outlook\Autodiscover
      DWORD: ExcludeSrvRecord
      Value: 1ORHKEY_CURRENT_USER\Software\Policies\Microsoft\Office\x.0\Outlook\Autodiscover
      DWORD: ExcludeSrvRecord
      Value: 1

Troubleshooting 2: Remove and re-add the mail account

Every time Outlook tries to perform the Autodiscover process, it keeps suggesting the old account, which turns out to be in “Set up > account> access work or school”, you need to remove this account and re-add the new account. This is seemly a known issue, so please kindly refer to this article: Something went wrong and Outlook couldn’t set up your account

In addition, if you are using outlook desktop client, please try to login OWA(outlook web app) to check whether there is anything different. OWA(outlook web app)

Please also try to clear the local cache and try again.
Clear credentials.
1. File>Account>under User Information, sign out all the existing account and exit all Office apps.
2. Control Panel>User Accounts>credential manager>Windows Credentials, remove all Office 365 credentials that look like: MicrosoftOfficeXXData:XXXXXXXXX
3. Right click windows icon>Run>type “regedit” then press ENTER to open the redistry editor. Go to HKEY_CURRENT_USER\Software\Microsoft\Office\16.0\Common\Identity, delete the whole Identity folder
4. Restart computer.

Troubleshooting 3: If you already try above resolutions but keep receiving this error, you may run registry to delete old email address. Also delete Identity HKEY_CURRENT_USER\SOFTWARE\Microsoft\Office\16.0\Common\Identity

Troubleshooting 4: If the OneDrive has the same issue, try to open the OneDrive app from office.com. To do that, login Office.com first. Open OneDrive online. Click on Settings icon and then select Get the OneDrive apps.

Click on Start OneDrive and then follow the instruction to login. After OneDrive works, you can try Outlook apps.

Troubleshooting 5: Delete the old email profile and create a new email profile.

Troubleshooting 6: Run Credential manager to remove old email credential.

Troubleshooting 7: In some cases, if you have Windows update pending, restart the computer.

Troubleshooting 8: If the device was joined to Azure DC, you may want to create a local ser account.  Note: Don’t remove the device from Azure AD except you are sure. If you do want to remove the device from the Azure AD, make backup for example, Documents, Desktop and Favorite folder.


Can’t add email address after Tenant Migration with this message: This email address has already been added

Situation: The client is in processing to migrate their Micrsoft Tenant. During the migration, they create a temporary email address for forwarding. After the migration, they try to switch to the original email address, but get this message: This email address has already been added.

Troubleshooting 1: Delete the old email profile and create a new email profile.

Troubleshooting 2: If the above doesn’t fix the problem, run registry editor (Regedit) to delete the email address.

Troubleshooting 3: Run Credential manager to remove old email credential.

Troubleshooting 4: In some cases, if you have Windows update pending, restart the computer.

Troubleshooting 5: If the device was joined to Azure DC, you may want to create a local ser account.  Note: Don’t remove the device from Azure AD except you are sure. If you do want to remove the device from the Azure AD, make backup for example, Documents, Desktop and Favorite folder.

I have OneDrive unlinked, but the Document folder still has one drive in my profile

Q: I have OneDrive unlinked, but the Document folder still has one drive in my profile.

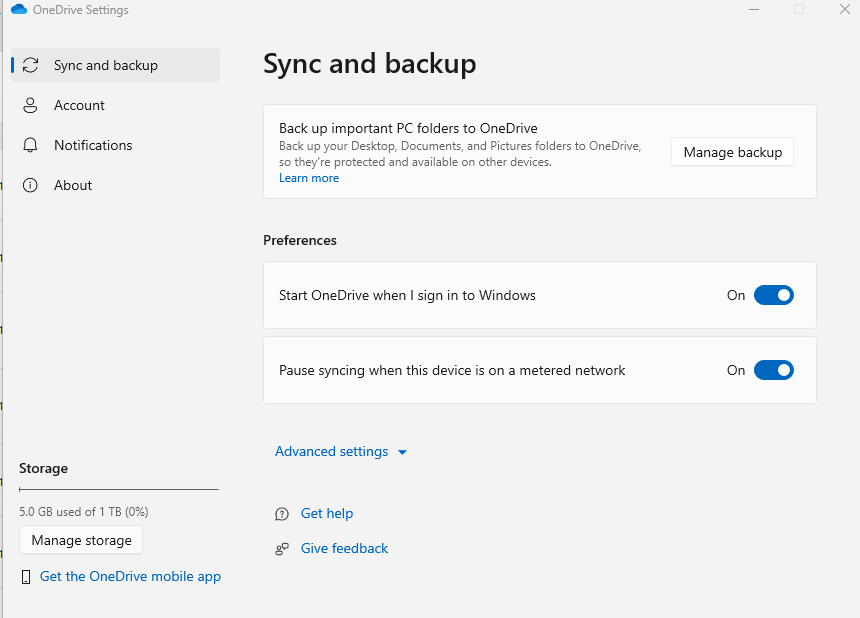
A: The correct procedure would be to turn off the OneDrive PC Folder Backup for the Documents folder. Unlinking from OneDrive does not remove OneDrive from the Documents folder path. Just see the video here. You will just click “Stop backup” instead of starting the backup.

https://support.microsoft.com/en-us/office/back-up-your-documents-pictures-and-desktop-folders-with-onedrive

A2:

1. No, uninstalling the OneDrive sync client will not deleted your file but make sure all the changes you made in the OneDrive sync client is synced to the OneDrive Online.

2. Yes, you can still access your content in the OneDrive even after uninstallation of OneDrive sync client.

3. When you setup the OneDrive account on the sync client, the File On-Demand feature will be enabled by default and because of this feature, initially all the content in your OneDrive folder will be cloud-only where it won’t take any space on your computer, but when you try to open any content in your OneDrive file, the opened file will be downloaded and take space on your computer, this will make you to open the file again even without internet connection. Reference: Save disk space with OneDrive Files On-Demand for Windows – Microsoft Support