Bob Lin, Chicagotech-MVP, MCSE & CNE
Data recovery, Windows OS Recovery, Networking, and Computer Troubleshooting on
http://www.ChicagoTech.net
How to Install and Configure Windows, VMware, Virtualization and Cisco on
http://www.HowToNetworking.com
I would suggest you to run Windows Update troubleshooter and check.
Follow these steps to run Windows Update troubleshooter.
a. Press Windows key + W and type troubleshooting.
b. Select Troubleshooting.
c. Select View All on the top left corner.
d. Run Windows update troubleshooter.
Method 2:
I would suggest you toremove the temporary files that Windows uses to identify updates for your computer.
Step 1: Stop Windows Update service
Follow these steps to stop Windows Update service.
a. Press Windows key + R and type “services.msc”.
b. Search for Windows Update service, right click on it and select Stop.
Step 2: Delete Temporary Update files
Follow these steps to delete temporary files.
a. Press Windows key+ E and double-click the local hard disk where Windows is installed.
b. Double-click the Windows folder, and then double-click the SoftwareDistribution folder.
c. Double-click the DataStore folder to open it, and then delete all files in the folder.
d. Click the Back button. In the SoftwareDistribution folder, double-click the Download folder to open it, delete all files in the folder, and then close the window.
Step 3: Start Windows Update service
Follow these steps to start Windows Update service.
a. Press Windows key + R and type “services.msc”.
b. Search for Windows Update service, right click on it and select Start.
Hope it helps. For any Windows related queries feel free to get back to us. We will be happy to help you.Regards,
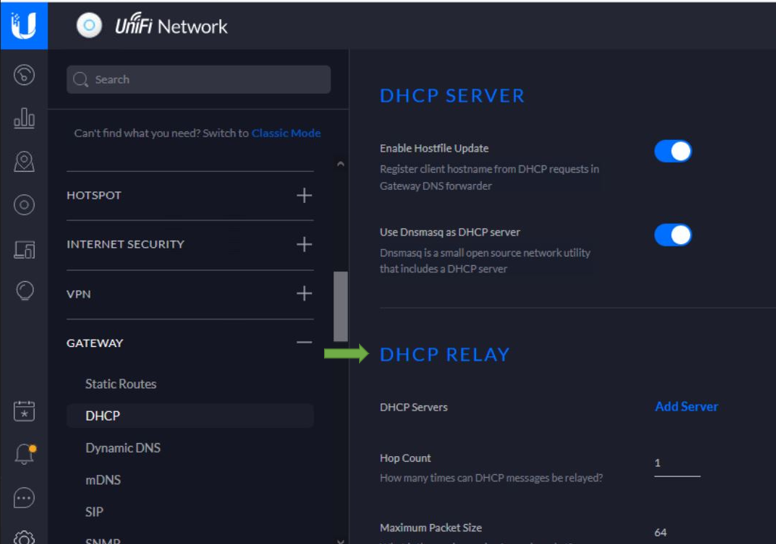
To setup DHCP on a WiFi router, you may have many options. This article shows some cases.
Case 1: A home user has Comcast Internet Service. By default, the xfinity modem assigns 10.1.10.0/24 IP address. He would like to change to 192.168.11.0/24.
1. Login xfinity website, for example https://10.1.10.1
2. Navigate to Gateway>Connection>Local IP Configuration.
3. Modify the IPv4 settings.
Tip: You have an option to restore default settings.
Case 2: The small company has Windows 2012 R2 DC with DHCP. They would like to use the same DHCP and LAN.
Case 1: The client re-configured their new Windows DC and PA-850 Firewall. He can ping a public IP address, but not Full Qualify Domain Name
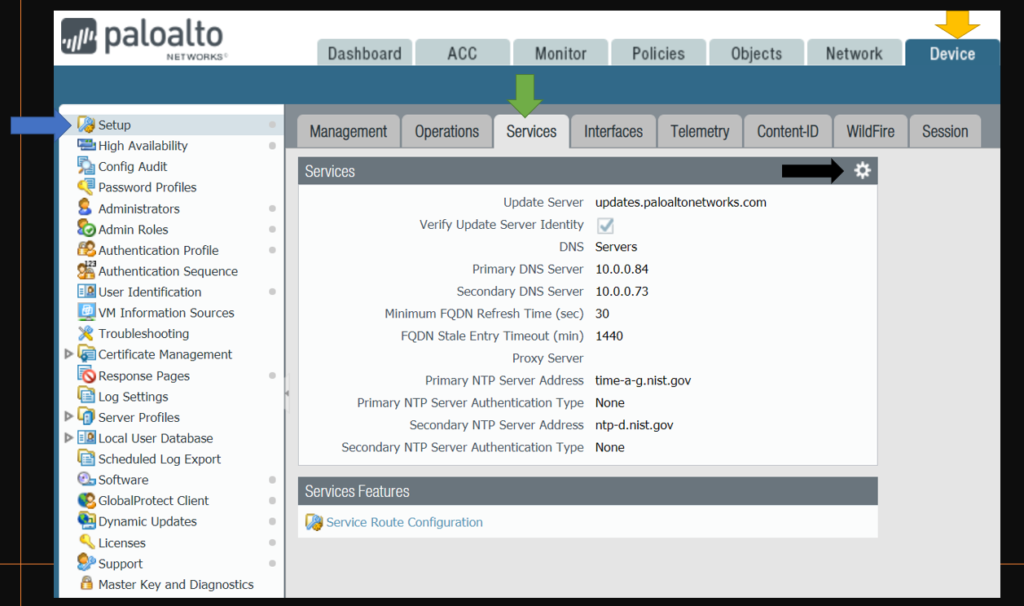
Troubleshooting: We run show deviceconfig system dns-setting config command to check the DNS settings, it shows 10.0.0.84 and 10.0.0.73, which are older DNS serer IP addresses. Replacing them with the new DNS IP addresses fixes the problem.
Case 2: The client just changes their IPS. They have a problem to access the Internet.
When the client checks the DNS settings on PA-850, it looks good.
Troubleshooting: In reviewing their configuration on PA-850, they still keep the old IPS IP address just in a case they need to switch back.
In this situation, we need to re-configure the DNS service on PA-850.
* Go toDevice>Setup>Services
•Click Services Route Configuration under Services.
•Check Customize
•Click on DNS
* Select the new IPS IP Address which you are using, which x.x.x.124/28 in our example.
Now, you should be able to ping FQDN.
Tips: We can use these command lines to check the DNS status.
Enable configuration mode
set cli config-output-format set configure
2. Run these commands:
Show deviceconfig system dns-setting
Show deviceconfig
Show deviceconfig show session all filter application dns
The client just migrated their DNS to a different server using a different IP address. This article shows how to modify the DNS Server on Paloalto Firewall based on PA-850.
If you are receiving error code 0xC004E028 when trying to activate your Windows it means that your computer is already in the process of activation. During the activation process, Windows sends out the Key to Microsoft servers to validate it.
Sometimes validation takes a long time, and if you try to activate it again, you will receive this error code 0xC004E028. Wait for a few more seconds you should be fine.
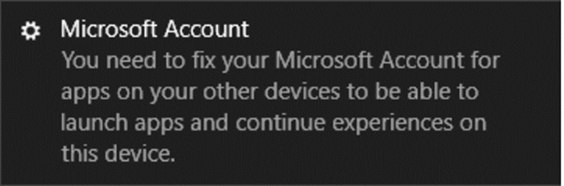
When login Windows 10 PC, you may receive a pop-up message saying “Microsoft account problem. We need to fix your Microsoft account. (Most likely your password changed). Select here to fix it in shared experiences settings.“ This article shows some cases with resolutions we have been working on this message.
Case 1: The client gets this “Microsoft account problem. We need to fix your Microsoft account” message when he logs in Windows 10 using Microsoft account.
Resolution: Login local user account and check the account settings.
* If you don’t have local account, cerate one by going to Settings>Account.
•Click Family & other users on the left pane.
•Under Other users, click on Add someone else to this PC.
* Click I don’t have this person’s sign-in information.
Click on Add a user without a Microsoft account.
* Enter the username, password, and follow the wizard to complete the settings.
•After login the user account, go to Settings>Account to check the account status.
•Then re-login Microsoft account.
Case 2: The client gets this message after sharing a folder.
Resolution: Go to Settings > System > Shared Experiences. Turn off Share across devices. Or Select My Devices only if it is on.
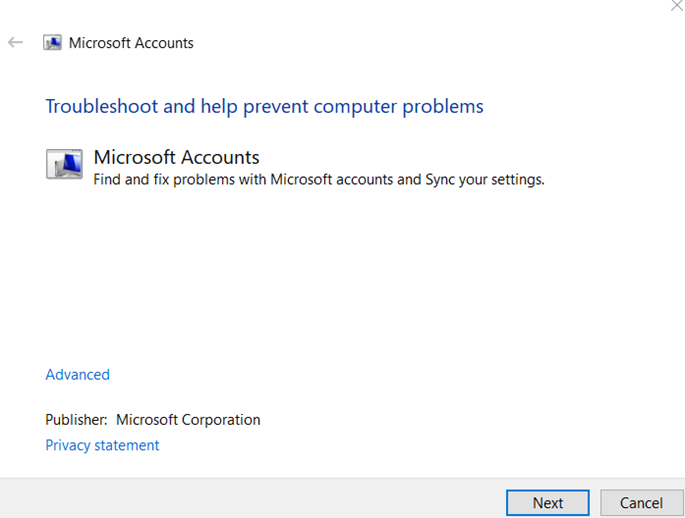
Case 3: Run the Microsoft Account Troubleshooter to automatically resolve the issue.
Click link below or search download the MS account troubleshooter
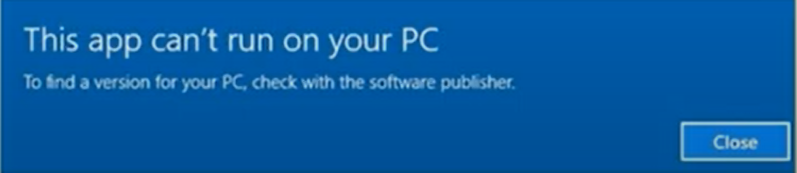
When running a app in Windows 10, you may receive this message: “This app can’t run on your PC”. This article shows all our case collections with resolutions.
1.Run Windows Store Apps Troubleshooter
Whenever you receive the “This App Can’t Open” error message in Microsoft store, one of the effective resolutions is to run the Windows Store Apps Troubleshooter, which could scan your system and detect the issues that might be preventing any Windows Store apps from working correctly. To run the Windows Store Apps Troubleshooter, take the following steps:
* Click the Start menu, and then type troubleshooting in the search field
* Click on Open
* Click on Additional troubleshooters
* Click Windows Store Apps from the listed results to open it
* Click on Run the troubleshooter
* Reset an app by clicking Open Apps & features.
* The troubleshooter will run and may fix the problem
2. Change UAC Settings
* Type UAC in Search bar, click on Change User Account Control settings. •Move the scale down for a test.
•When to be notified about changes to your computer, and click OK
•Reboot your computer and then test to run the app.
3. Install latest Windows update.
•Check the Windows Update statues. It may be pending for restart or need to download/install.
•Click Settings>Update & Security
4. Re-install/Repair or upgrade the app.
•Go to Control Panel to Repair, uninstall/Re-install the app.
5. Re-register Windows Store through Windows PowerShell
Step 1. Click the Start menu, and then type powershell in the search field
Step 2. Right-click on Windows PowerShell from a list of results
Step 3. Click on Run as Administrator
Step 4. Click Yes in the popup.
Step 5. In the Windows PowerShell window, type the following command and then hit Enter
Step 6. Your Windows Store will be re-registered once it is finished, test the app.
6. Change ownership of your C: drive
Sometimes Windows 10 apps won’t open due to ownership problems, but you can easily fix that. To change the ownership of a folder, or a hard drive partition, do the following: * Open This PC and locate the drive where Windows 10 is installed. By default it should be C. * Right click the drive and choose Properties. * Go to Security tab and click the Advanced button.
* Find Owner section and click Change.
* In Select User or Group page, type the username or group name. or click Advanced button.
* Click Find Now button. List of users and user groups will appear. Select the Administrators group and click OK.
* In Select User or Group window click OK. select-users-or-group * In Advanced Security Settings window owner should be changed to Administrators and Administrators group should be added to Permission entries list. Check Replace owner on subcontainers and objects. replace-owner * Click Apply and OK. Wait for the process to complete.
7. Try different account.
•In some cases, the account can’t run an app because the account profile has been damaged. Try different account or create a new account to run the app.
•You can go to Settings>Account to create a new account.
8. Make sure the app is compatible with Windows OS
Case 1: If the app is 32 bit running on Windows 10 64 bit, you may receive this message: Windows protect your PC.
Resolution: ClickRunanyway.
Case 2: A old app was designed for Windows XP.
Resolution: Right click the executable file. Select Properties. On the Compatibility tab, check Run this program in compatibility mode for, and then select Windows XP.
9. Download the program in local drive.
•We had a case. The client can’t install the Adobe Acrobat over VPN connection.
•Resolution: Download the adobe Acrobat to the local C drive download folder and install it.
10. Enable App Side-loading
To enable app side-loading, do the following:
1.Open Settings app and navigate to Update & Security section.
2.Go to For developers page turn on Developer mode.
11. Update Windows Store
1.Open the Microsoft Store app from the Start menu.
2.Click on the 3-dot menu in the far right corner and open Downloads and updates.