Can’t take over ownership with ‘Failed to enumerate objects in the container. Access is denied’

Situation: The client is running Windows server 2019. When he tries to take over owner on one of the folders with “Replace all child object permissions entries with inheritable permission entries from this object.’ option checked, he gets this message: ‘Failed to enumerate objects in the container. Access is denied’

Resolution 1: Use takeown command, for example

takeown /f * /r /d y

  • means all folders and Fiels in the current directory. To see more options, run this command: takeown /?

Resolution 2: propagate the owner

propagate the owner, then close out of ALL dialogs, before you propagate the actual permissions.

I can’t really say how it got messed up, but this should fix it.  These steps are a bit involved, but just take it step-by-step (some users print them and mark off what step they’ve done).  If you get stuck, just let me know what step you’re on.

  1. Press Windows+R to show the Run box.
  2. Type (or copy/paste)  %userprofile% (including the percent signs) into the box and hit OK to open your user profile folder.
  3. Right-click the Documents folder and go to Properties.
  4. On the Security tab, click Advanced.
  5. At the top, make sure the “owner” is set to your account.  If it already is, please skip to step 6.
    • If the owner is not you, click Change.
    • Click Advanced
    • Click Find Now
    • Select (highlight) your account in the list (it may be a name or email address depending on your setup), then click OK to close the search box.
    • Click OK again to close the “select a user” box.
    • Turn ON checkbox for “replace owner on subcontainers and objects” (this makes sure you are the owner for everything under your documents folder also).
    • After the checkbox is on, click OK close the “advanced security” box.
    • Click OK again to close the Documents Properties box.  At this point, you should be back where you were after step 2 when you opened the User Profile folder.
    • Right-click the Documents folder again, and go back to properties,
    •  On the Security tab, click Advanced, then continue with step 6 below.
  6. Click “Add”
  7. Click “Select a principal”
  8. Click Advanced
  9. Click Find Now
  10. Select (highlight) your account in the list (it may be a name or email address depending on your setup), then click OK to close the search box.
  11. Click OK again to close the “select a user” box
  12. Turn on “Full Control” checkbox.
  13. Click OK to close the Permission Entry box.
  14. Click OK again to close the “Advanced Security” box.
  15. Click OK again to close the Documents Properties box.  At this point, you should be back to where you were after step 2 when you opened the User Profile folder.

Note: We find we need to run takeown /f * /r /d y on each level of the folder or each subfolders.

GloablProtect: Connect Failed because could not verify the server certificate of the gateway

Situation: When a user tries to establish VPN using GloablProtec, he gets this message: could not verify the server certificate of the gateway.

Troubleshooting: Make sure the PA Firewall has corrected certificate setup.

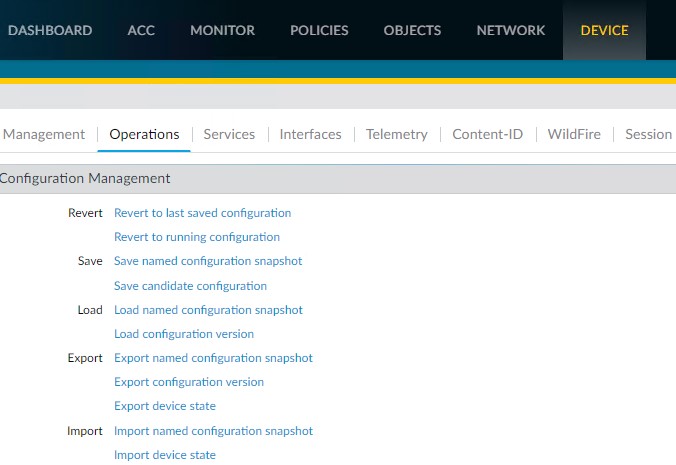
  1. Go to Device>Certificates, make sure you have corrected certificate installed.

2. Go to Network>GloablProtect>Portals>Agent. Make sure you add the corrected certificate.


Send as email gets undeliverable message

Situation: The user has assigned full permissions, Sens as and Send on behalf. However, she tries to send email behalf another user, she gets undeliverable message:

Your message did not reach some or all of the intended recipients.

Subject:     RE: Administrative Copy: Welcome! | 246594

Sent:  6/8/2022 10:12 AM

The following recipient(s) cannot be reached:


‘Bob Smith’ on 6/8/2022 10:12 AM

This message could not be sent. You do not have the permission to send the message on behalf of the specified user.

Troubleshooting 1: When she sends email behalf another user, she may need to select the user From. For example

If you don’t see the From, select the Options tab and press the “Show From” button to enable the from field for all sent emails

Troubleshooting 2: In our cases, the user has two email addresses, user@Aemail.com as default email address and user@Bemail.com. The From should be user@Aemail.com instead of user@Bemail.com.

Microsoft LAPS doesn’t show the password

Situation: The client has deployed Microsoft LAPS. However some of computers don’t show the administrator password when checking local administrator under User’s Property>Attribute Editor.

Troubleshooting 1: Run gpdaute /force or restart the computer to apply the GPO.

Troubleshooting2: The local administrator account is disabled. Enable it.

Troubleshooting 3: GPO can’t install the LAPS software as showing gpupdate /R:

Computer Policy update has completed successfully.

The following warnings were encountered during computer policy processing:

The Group Policy Client Side Extension Software Installation was unable to apply one or more settings because the changes must be processed before system startup or user logon. The system will wait for Group Policy processing to finish completely before the next startup or logon for this user, and this may result in slow startup and boot performance.
User Policy update has completed successfully.

For more detailed information, review the event log or run GPRESULT /H GPReport.html from the command line to access information about Group Policy results.

Certain Computer policies are enabled that can only run during startup.

OK to restart? (Y/N)

If the gpupdate /force doesn’t install LAPS, please install it manually.

Outlook Search doesn’t show some emails

Summary of resolution:

-Toggled the cached exchange mode

-checked on outlook web – all good / sent items are there

-Look up the lost messages in the outlook all file – no go

-Search tool = Indexing –  no go

-Choose location to search = good

-Created registry dword value = SaveSent =

-Clear the outlook profile – no go

-Run dsregcmd /forcerecovery


-Please create a new windows profile.

-Run the Outlook and Sync the emails from cloud.

-Export the PST file and Import it to the original windows profile.


-Go to  the Registry edit HKEY_LOCAL_MACHINE\SOFTWARE\Policies\Microsoft\Windows\Windows Search > New DWORD (32-Bit) “PreventIndexingOutlook”> Edit the DWORD and set the value to “1”. The search function works

-unchecked the option of “Improve search speed by limiting the number of results shown” from File > option > Search in Outlook

-close outlook and go to Windows search and run outlook.exe /resetnavpane

-Restart Windows Search in task manager.