Bob Lin, Chicagotech-MVP, MCSE & CNE
Data recovery, Windows OS Recovery, Networking, and Computer Troubleshooting on
http://www.ChicagoTech.net
How to Install and Configure Windows, VMware, Virtualization and Cisco on
http://www.HowToNetworking.com
Ensure you have the correct account number, billing address, and any required PIN from your current service provider.
Check for pending issues:
Resolve any overdue invoices or outstanding contracts with your current provider, as they may block or delay the porting process.
Choose the numbers to port:
Make a list of the phone numbers you want to transfer.
Step 2: Submit a Porting Request in Microsoft Teams
Log in to Microsoft Teams Admin Center:
Use your admin credentials to access the portal.
Go to Voice > Phone Numbers > Port Orders.
Create a New Port Order:
Log in to Microsoft Teams Admin Center:
Use your admin credentials to access the portal.
Go to Voice > Phone Numbers > Port Orders.
Create a New Port Order:
Assuming you would like to transfer a 855 toll-Free number to your current phone number 847, click on Port.
Enter your current provider’s details and the list of phone numbers to port.
Select the country or region and enter the phone number.
Click on Next and make sure valid number is marked green.
Add account information such as Order name, Requested port date, Organization, Service provider, Authorized user details,
Upload a Letter of Authorization (LOA):
Microsoft Upload a Letter of Authorization (LOA):
Microsoft may require you to provide an LOA, which authorizes them to act on your behalf to transfer the numbers.
Step 3: Review and Submit
Double-check all details:
Verify the accuracy of your account information and the list of numbers.
Submit the port order:
Once submitted, Microsoft will validate the information and forward it to your current provider for approval. You can check the order status from Microsoft Teams admin center, Voice, Phone numbers, Oder History.
Step 4: Monitor the Porting Status
Track the progress in the Admin Center:
Go to Voice > Port Orders to view the status of your request.
Respond to any rejections or issues:
If the porting request is rejected, Microsoft will notify you with the reason. Common causes include:
Incorrect Customer name.
Incorrect service address.
Mismatched authorized person
Mismatched phone numbers.
Work with your current provider to resolve issues:
Correct any mismatches or pending items as needed.
Step 5: Complete the Transfer
Receive a confirmation from Microsoft:
You’ll be notified once the porting is complete, usually within 3–7 business days.
Test the numbers in Microsoft Teams:
Make test calls to ensure the numbers are active and functioning in Teams.
Update call routing settings:
Set up auto-attendants, call queues, or direct routing if necessary.
Tips for a Smooth Porting Process
Always have backup numbers or services during the porting period to avoid interruptions.
Microsoft claims that printing errors 0x00000709, 0x0000007c & 0x000006e4 are resolved with KB5007253 update. So, before proceeding to the methods below, download and install manually the KB5007253 from Microsoft Update Catalog and see if the problem is fixed.
Method 2. Fix Network Printing Error 0x00000709 in Registry.
1. Open Command prompt as Administrator. 2. In Command Prompt give the following command according your Windows 10 version:
Method 3. Fix error 0x00000709 in Network Printing by Overriding Printer Installation Restrictions.
Windows updates released August 10, 2021 and later will, by default, require administrative privilege to install drivers. To work around this behavior and allow users to install network printer drivers, do the following:
1. Open Command prompt as Administrator. 2. In command prompt, give the following command:
Method 4: Edit The Group Policy And System’s Registry
Since Windows 11 22H2 the default connection method has changed, and you will need to alter a Group Policy Editor setting to resolve the issue.
If you have a printer server or host, you will need to make changes to that system as well. If you have a network-shared printer, then only apply the client-side configurations.
On the Host
Click Windows and type GPEdit.
Open Group Policy Editor
2. Select Edit Group Policy and to Computer Configuration > Administrative Templates > Printers.
3. Open Configure RPC Connection Settings and set it to Enabled.
4. Set the dropdown of Protocol to Use for Outgoing RPC Connections to RPC Over Named Pipes.
Enable Configure RPC Connection Settings and Set its Protocol to RPC Over Named Pipes
5. Open Configure RPC Listener Settings and set it to Enabled.
Open Configure RPC Listner Settings
6. Set the protocol to Choose RPC Over Named Pipes and TCP.
7. Click Windows and search for Registry Editor.
8. Right-click on it and select Run as Administrator.
The first method for solving printing or network printer installation problems is to remove KB5006670 & KB5007186 (if installed). To do that:
1. Open the Runutility by pressing the Windows + R keys on your keyboard. 2. Type cmd and press the keys Ctrl+Shift+Enter to open the Command Prompt in Admin mode. *
* Note: If you see any windows asking up for permission, click on Yes.
3. Type the following command and press Enter:
wusa /uninstall /kb:5006670
4. Once a Confirmation dialogue box appears, click on Yes.
5. Once the uninstallation process is completed, restart the computer. 6. Now try to print or to install your default printer. The printer installation should succeed this time. If you still face problems, proceed and uninstall also the KB5007186 update, by giving this command (in admin command prompt): *
wusa /uninstall /kb:5007186
* Note: If your be able to install the default printer without error, I suggest to prevent KB5006670 update to be reinstalled on the future, by doing the following:
1. Download the Show or Hide updates tool tool from: https://www.majorgeeks.com/files/details/wushowhide.html 2. Run the “wushowhide.diagcab”, click Next and then click Hide Updates. 3. Select the 2021-10 Cumulative Update for Windows 10 (KB5006670) and click Next.
Method 6: Bypass 0x00000709 error by Setting the Default Printer in Registry.
Another method to overcome the printer error “0x00000709 – Operation cannot be completed”, is to set default printer in registry. (This method works in Windows 7 OS) *
* Note: This method has been tested and works on the Windows 7 operating system when the default printer cannot be set by using the usual way (Control Panel > Devices & Printers > right-click on Printer > Set as Default).
Step 1. Copy the Printer Name as it appears on Printers group.
1. Navigate to Control Panel -> Devices & Printers. 2.Right-click the printer you can’t print to and select Properties. 3.Mark the printer’s name and right-click -> Copy.
Step 2. Set Default Printer in Registry.
1. Open the Run utility using the Windows + R shortcut on your keyboard. 2. Type regedit and press OK. *
* Note: If you see any windows asking up for permission, click on Yes.
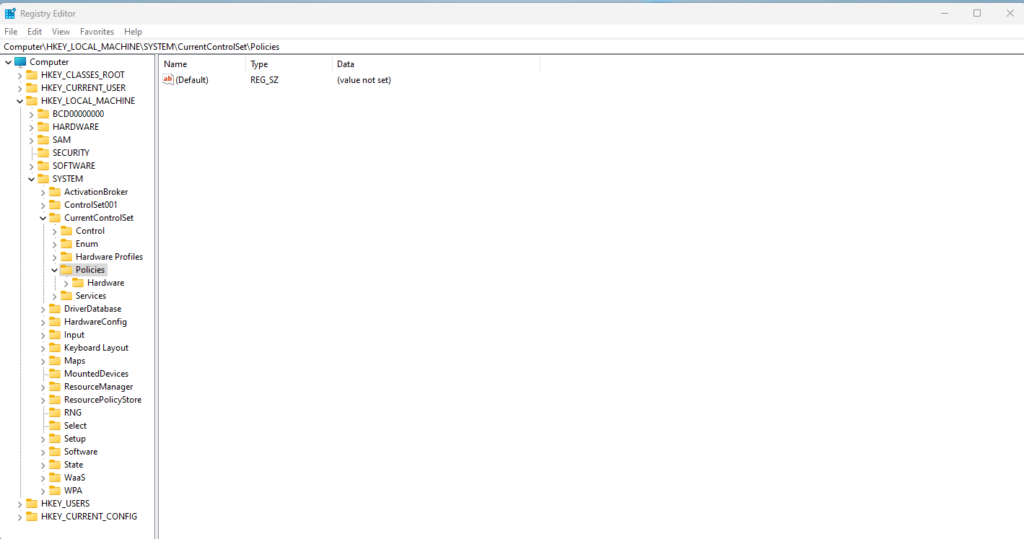
3. In Registry Editor window, navigate to this location: *
4. Now take a moment to create a backup of the “Windows” registry key as follows: *
* Important: Modifying Registry is highly risky, so make sure to take a backup before modifying. Creating a backup will help you to revert at any time.
a. Right-click on Windows key and select Export.
b. Choose the location where you wish to save the registry key backup and rename it accordingly. Click on Save.
5a. Now select the Windows folder on the left and then double-click on Device REG_SZ value on the right pane.
5b. On the Value data, type (paste) the name of your Printer as it’s shown at Devices & Printers* and click OK. **
* Important Notes: 1. Make sure you do not make any changes after the first dot (.) and leave the “.winspool.Ne0x:” value untouched. Just change the name of the printer as shown in the screenshot below. 2. If the printer is shared by another computer, type the printer name as follows: ¨\\ComputerName\PrinterName”
** 3. If you receive the error “Cannot edit Device: Error writing the value’s new contents”, proceed as follows:
1. Right-Click on Windows key and select Permissions
2. On Restricted, Administrators and your account, select Full Control & Read and click OK.
3. Perform steps 5a & 5b to modify the Device REG_SZ value as instructed above .
6. Close Registry Editor and restart your PC.
Method 7. Uninstall and re-Install Printer.
The last method to fix the network printing error 0x00000709, is to re-install the shared printer. To do that:
1. Navigate to Control Panel -> Devices & Printers. 2. Right-click on the Printer and select Remove Device.
3. Finally, re-install the network printer by using one of the following ways:
Way 1. Click Add a Printer and let Windows to find and install the network printer.
Way 2. Install the Shared Printer from Network:
1. Open the “Run” command box. 2. Type “\\” followed by the name of the machine on your network with the shared printer and click OK.
3. Right-click on the shared printer and click Connect.
You’ve got a MacBook Pro that was returned or purchased secondhand, but when you try to reset it to factory settings, you’re hit with this message: This Mac is linked to an Apple ID. Enter the Apple ID and password that was previously used.
Frustrating, right?
Let me guide you through what’s happening and how to resolve it. This is Apple’s Activation Lock, a built-in security feature designed to keep your device secure. It prevents unauthorized access by linking the Mac to the original owner’s Apple ID. Without those credentials, the MacBook can’t be reset or used.
But don’t worry, here’s what you can do.
Option 1: Contact the previous owner. They’ll need to remove the MacBook from their Apple ID account.
Log in to iCloud.com.
2. Two, go to Find My iPhone or Find My Mac.
3. select the device.
4. click Lock to unlock or erase Mac.
Once they’ve done this, the MacBook will no longer be linked to their Apple ID, and you can reset it.
Option 2: gather proof of ownership.
If contacting the previous owner isn’t an option, your next step is proving you’re the rightful owner. Look for the original receipt or proof of purchase. It should include the MacBook serial number. With this in hand, contact Apple Support or visit an Apple Store. Explain your situation, and they’ll verify the details. If all checks out, they can help unlock the device.
One important thing to note, avoid third arty services or online claims that they can bypass activation lock.
These are often scams and can make the situation worse or even damage the device.
A Windows 11 desktop taking 15 minutes to boot up is usually caused by a combination of hardware and software issues. Here are the most common factors and fixes:
Too Many Startup Programs: Excess startup programs can delay booting. To check and manage them, go to Task Manager > Startup tab and disable unnecessary programs from launching at startup.
Outdated or Corrupted Drivers: Outdated drivers, especially graphics or storage drivers, can slow down the boot process. Open Device Manager, locate and right-click on hardware components, and select “Update driver.” It’s particularly important to update your graphics card, storage, and motherboard drivers.
Full or Fragmented Hard Drive: If your system drive is nearly full or fragmented, it can significantly slow down boot times. Check disk space by opening Settings > System > Storage, and free up space if needed. If you’re using an HDD (hard disk drive), run a disk defragmentation from Defragment and Optimize Drives.
Windows Update Issues: Unfinished updates or errors during updates can cause delays. Go to Settings > Windows Update and ensure that all updates have been installed. Sometimes, an update reset can help, which can be done via Command Prompt with the command:shellCopy codenet stop wuauserv net stop bits net stop cryptsvc ren C:\Windows\SoftwareDistribution SoftwareDistribution.old net start wuauserv net start bits net start cryptsvc
Corrupted System Files: System file corruption can cause various boot issues. To check and fix, open Command Prompt as an administrator and run:shellCopy codesfc /scannow This command will scan and repair corrupted system files.
Malware or Viruses: Malware can slow down boot times. Run a full scan with Windows Defender or a third-party antivirus tool to check for infections.
Slow or Failing Hard Drive: If you’re using an HDD instead of an SSD, consider upgrading to an SSD for much faster boot times. If the HDD is old or failing, it might be worth testing it using a disk health tool (like CrystalDiskInfo) to check for any errors or signs of failure.
Fast Startup Feature: Though Fast Startup is generally useful, it can cause issues on some systems. To toggle this feature, go to Control Panel > Hardware and Sound > Power Options > Choose what the power button does > Change settings that are currently unavailable and uncheck Turn on fast startup.
These steps address most causes of slow boot times on Windows 11. Starting with Task Manager to disable unnecessary startup programs and running checks on hardware health and drivers can provide immediate insights and improvements.
If you’re experiencing issues with Excel and need to repair it, Microsoft provides several methods to fix the application. Here’s a step-by-step guide to repair Excel:
Method 1: Quick Repair or Online Repair via Control Panel
Open Control Panel:
Press Windows + S, type Control Panel, and select it from the list.
Navigate to Programs:
Click on Programs (or Programs and Features if using a classic view).
Locate Microsoft Office:
Scroll down and find Microsoft Office or Microsoft 365 (depending on your version).
Right-click on it and select Change.
Choose Repair Option:
A dialog box will appear with two options: Quick Repair and Online Repair.
Quick Repair:
Fast and doesn’t require an internet connection.
Attempts to fix issues without reinstalling the entire suite.
Online Repair:
More comprehensive but requires an internet connection.
Fixes deeper issues by reinstalling and repairing the complete set of Office files.
Select the Repair Option:
Start with Quick Repair. If this doesn’t fix the problem, repeat the steps and choose Online Repair.
Follow the On-Screen Instructions:
After selecting the repair option, follow the prompts. It may take several minutes depending on the repair type.
Method 2: Repair Excel via Microsoft Settings (Windows 10/11)
Go to Settings:
Press Windows + I to open the Windows Settings app.
Navigate to Apps:
Click on Apps and then Installed apps.
Find Microsoft Office:
Scroll down and select Microsoft Office or Microsoft 365.
Click on Modify.
Choose Repair Option:
Similar to the method above, you’ll be prompted to choose between Quick Repair or Online Repair. Choose the one that suits your needs.
Complete the Repair Process:
Follow the on-screen instructions and let the repair process complete.
Method 3: Reinstall Microsoft Office
If repairing Excel doesn’t resolve the issue, you may need to reinstall the entire Office suite.
Uninstall Microsoft Office:
Go to Control Panel > Programs > Programs and Features.
Right-click on Microsoft Office and select Uninstall.
Reinstall Microsoft Office:
After uninstalling, reinstall Office by either downloading it from your Microsoft 365 account or using the installation media.
Method 4: Update Excel
Sometimes updating Excel to the latest version can resolve issues.
Open Excel.
Go to File > Account.
Click Update Options > Update Now.
This will ensure you have the latest version of Excel, which may fix bugs and issues you’re encountering.
Method 5: Disable Add-ins
Excel Add-ins can sometimes cause Excel to crash or freeze. You can disable them temporarily to see if they are causing the issue.
Open Excel.
Go to File > Options > Add-ins.
At the bottom, select COM Add-ins from the drop-down list and click Go.
Uncheck any Add-ins that are enabled, and click OK.
Restart Excel and see if the issue is resolved.
Method 6: Run Microsoft Office Troubleshooter
If you’re using Office 365 or Microsoft Office, you can use the built-in troubleshooter to identify and fix common issues.
Go to Settings > Update & Security > Troubleshoot.
Scroll down and select Windows Store Apps or Other troubleshooters and run the troubleshooter.
Follow the steps to identify and resolve any issues with Excel.
The error you’re encountering, “server or share name specified in the path may be invalid,” typically occurs when the Exchange server is unable to access the network share where you’re trying to save the PST file. This could be due to a number of reasons, such as incorrect permissions, an inaccessible network path, or incorrect formatting of the file path.
Here are some steps to troubleshoot and resolve the issue:
1. Verify the Network Share Path:
Make sure that the path you’re using is correct and accessible from the Exchange server.
The path should be in UNC format (e.g., \\ServerName\ShareName\filename.pst).
Test the Path:
From the Exchange server, open File Explorer and try to manually navigate to the path.
Ensure that the server name and share name are correct and that you can create a file in that location.
2. Check Permissions:
Ensure that the “Exchange Trusted Subsystem” group has Read/Write permissions on the network share.
To set permissions:
On the file server, navigate to the shared folder.
Right-click the folder, choose Properties, and go to the Sharing tab.
Click Advanced Sharing and then Permissions.
Add Exchange Trusted Subsystem with Full Control permissions.
Verify that the share permissions and the NTFS permissions both allow access.
3. Use the Exchange Server’s FQDN:
Sometimes, using the fully qualified domain name (FQDN) of the server in the UNC path can resolve the issue.
Example: Instead of \\FileServer\PSTExports\UserMailbox.pst, use \\FileServer.Domain.com\PSTExports\UserMailbox.pst.
4. Ensure the Exchange Server Has Access to the Share:
If you’re using multiple Exchange servers, ensure that the server processing the request has access to the network share.
You can force the export request to run on a specific server by specifying the -MailboxServer parameter when using PowerShell:powershellCopy codeNew-MailboxExportRequest -Mailbox "UserMailbox" -FilePath "\\FileServer\PSTExports\UserMailbox.pst" -MailboxServer "ExchangeServerName"
5. Test the Path with PowerShell:
You can try running a simple command to test if the Exchange server can write to the share:powershellCopy codeTest-Path -Path "\\FileServer\PSTExports\test.txt"
You can also try creating a test file:powershellCopy codeNew-Item -Path "\\FileServer\PSTExports\test.txt" -ItemType "file"
If these fail, the issue is likely with permissions or the network path.
6. Check for Typos and Format Errors:
Ensure there are no typos or extra spaces in the path.
Double-check the share name and folder structure.
7. Restart the Exchange Server:
If you’ve verified the above steps and are still encountering issues, try restarting the Exchange server. This can sometimes resolve permission or network issues.
8. Consider Local Export:
As a last resort, you could export the PST file to a local drive on the Exchange server and then manually move the file to your desired location:powershellCopy codeNew-MailboxExportRequest -Mailbox "UserMailbox" -FilePath "D:\Exports\UserMailbox.pst"
After the export, you can manually copy the PST file to the network share.
By following these troubleshooting steps, you should be able to resolve the issue and successfully export the PST file from Exchange 2016. If the problem persists, double-check all network configurations, or consider engaging your network or system administrator to assist with the file share setup.
Q: Recently, when I click on a link people sent to me n Microsoft Teams, it always redirects to https://statics.teams.cdn.office.net/evergreen-assets/safelinks/1/atp-safelinks.html. Why?
A: The link you provided appears to be related to Microsoft’s Safe Links feature, part of Microsoft Defender for Office 365. Safe Links is designed to protect users from malicious links in emails and other Office 365 communications, such as Teams. When you click a link in a Teams message, email, or document, Safe Links checks the URL for any potential threats, such as phishing or malware. If the link is safe, it will redirect you to the intended destination. If it’s not, Safe Links blocks access or warns you about the potential danger.
If you find that your Teams links are consistently redirecting through Safe Links, it could be due to the following reasons:
Organization Policy: Your organization may have Safe Links enabled by default for all Office 365 applications, including Teams, to provide an extra layer of security.
Malicious Link Detection: Safe Links is checking the URL to ensure it’s safe before allowing access, even if the link is legitimate.
URL Rewriting: Safe Links may rewrite the URLs to route through its service for tracking and security purposes, which is why you see the Safe Links URL instead of the original one.
If this behavior is causing issues or if you believe it’s unnecessary for certain links, you can reach out to your IT administrator. They can adjust the Safe Links policies based on your organization’s security requirements.
Hi everyone! Today, we’re diving into troubleshooting Microsoft Teams issues. If you’re experiencing problems with Teams, don’t worry. We’ve got you covered with some easy solutions. Let’s get started!
1. Check Your Internet Connection
First things first, make sure your internet connection is stable. Teams relies on a strong connection to function properly. Try resetting your router or switching to a different network to see if that resolves the issue.
2. Update Microsoft Teams
Outdated software can cause problems. To update Teams, click on your profile picture in the top right corner of the app and select ‘Check for updates.’ Teams will download and install any available updates automatically.
3. Clear the Teams Cache
Sometimes clearing the Teams cache can fix various issues. Press Windows + R, type %appdata%\Microsoft\Teams for Classic Teams, and press Enter. If you are using new Teams, type %userprofile%\appdata\local\Packages\MSTeams_8wekyb3d8bbwe\LocalCache\Microsoft\MSTeams. Delete everything in this folder to remove old settings and cached data.
4. Verify Permissions
Check if Teams has the necessary permissions. Go to Settings, click on ‘Privacy,’ and ensure that Teams has access to your camera, microphone, and other relevant permissions.
5. Reinstall Microsoft Teams
If none of the above steps work, try reinstalling Teams. Uninstall the app from your device, then download the latest version from the Microsoft Teams download page and reinstall it.
And there you have it—some quick and easy solutions for common Microsoft Teams problems. If this video helped you out, please give it a thumbs up and subscribe for more tech tips. If you have any questions or need further assistance, leave a comment below.