You do not have sufficient privileges to delete cn=Microsoft Exchange System Objects

If you receive an error message indicating that you do not have sufficient privileges to delete the “cn=Microsoft Exchange System Objects” container in Active Directory, it’s likely that your account does not have the necessary permissions to delete this container.

Here are some steps you can take to resolve this issue:

  1. Verify that you are a member of the appropriate security groups: In order to delete the “cn=Microsoft Exchange System Objects” container, you must be a member of the Enterprise Admins and Schema Admins security groups in Active Directory. Verify that your account is a member of both of these groups.
  2. Check your permissions on the container: If you are a member of the Enterprise Admins and Schema Admins groups and still cannot delete the “cn=Microsoft Exchange System Objects” container, check your permissions on the container. You may need to modify your permissions to allow you to delete the container. To modify your permissions, right-click on the container, select Properties, and then select the Security tab. Check that you have Full Control permissions on the container. Note: You may need to re-login after assigning the full permissions.
  3. Use a privileged account: If you are still unable to delete the container, it’s possible that your account does not have sufficient privileges. In this case, you should try using a privileged account that has the necessary permissions to delete the container. Be sure to log on with this account before attempting to delete the container.
  4. Contact Microsoft Support: If you have tried the above steps and are still unable to delete the container, it’s possible that there is an issue with your Active Directory installation. In this case, you should contact Microsoft Support for assistance. They can help you diagnose and resolve any issues that may be preventing you from deleting the container.

palo palto firewall failed in virtual-router default the static route Route to WAS is not unique

The error message “palo alto firewall failed in virtual-router default the static route route to is not unique” indicates that there is a problem with the configuration of the Palo Alto firewall.

Specifically, it appears that there is a static route configured in the “default” virtual router that is not unique. This means that there are two or more routes with the same destination network and prefix length. This can cause issues with traffic routing and can lead to network connectivity problems.

To resolve this issue, you will need to review the static routes configured in the “default” virtual router and ensure that each destination network has a unique route. You may need to remove or modify duplicate routes to ensure that traffic is routed correctly.

It is also important to review the overall network topology and routing configuration to ensure that there are no other issues that could be contributing to this problem. This may involve reviewing the routing tables of other devices in the network, as well as any routing protocols that are being used.

Fix computer power on and then off, can’t see windows screen after windows update

If your computer is turning on and then immediately turning off, or if you can’t see the Windows screen after a Windows update, there are a few things you can try to fix the issue:

  1. Perform a hard reset: Turn off the computer, unplug it from the power source, and remove the battery (if your computer has one). Wait for a few minutes, then plug the computer back in and turn it on.
  2. Boot into safe mode: If you can’t see the Windows screen after a Windows update, try booting into safe mode. To do this, turn on the computer and immediately start pressing the F8 key repeatedly until the Advanced Boot Options menu appears. From there, select “Safe Mode” and press Enter.
  3. Use a bootable USB drive: If you can’t boot into safe mode, try using a bootable USB drive to repair the Windows installation. You’ll need to create a bootable USB drive on another computer and then use it to boot your computer.
  4. Check your hardware: If the above steps don’t work, it’s possible that there’s a hardware issue with your computer. Check your computer’s RAM, hard drive, and other components to make sure they’re all functioning properly.
  5. Perform a system restore: If all else fails, you may need to perform a system restore to restore your computer to a previous state before the Windows update. To do this, boot into the Advanced Boot Options menu (as described in step 2), select “Repair Your Computer”, and then follow the prompts to perform a system restore.

You can’t reset your own password because password reset isn’t turned on for your account.

Situation: When attempting to reset your office 365 password, you may receive this message: You can’t reset your own password because password reset isn’t turned on for your account. You must contact your administrator to turn on password reset for your account.

Resolution: Have your administrator to enabling self-service in Office 365. Please refer to this post:

How to enable office 365 self-service password reset?

Can’t login after joining domain over VPN

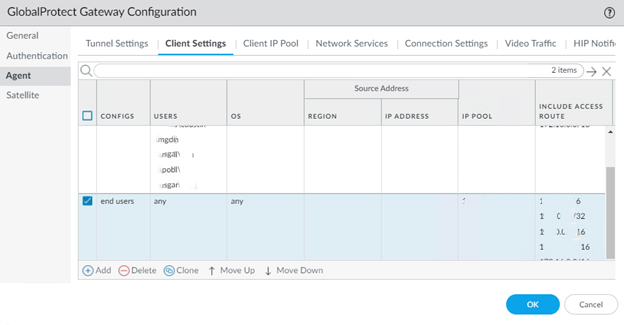
Situation: The client attempts to join a remote computer to their domain over GlobalProtect. They can join the computer to the domain. However, they can’t login using domain account after restarting the domain computer because the GlobalProtect VPN is off.

Troubleshooting and cases.

Case 1: If you lock the PC, instead of the switch user option, it does not disconnect GP and will allow you to log into the domain account.

Case 2: Cache the domain account by Run different user.

  • Keep GP conncted.
  • Run an application, for example PanGPA.exe > shift+right clicked > Run as different user.

  • Now, try to login the domain account without VPN.

3. Cache the by mapping a domain network drive.

4. Add Windows Credentials manually.

Run Credentials Manager>Windows Credentials>Add a Windows credentials.

Fixing Outlook AutoCorrect problem

If you’re experiencing issues with AutoCorrect in Outlook, here are some troubleshooting steps you can try:

  1. Check your AutoCorrect settings: Go to File > Options > Mail > Spelling and Autocorrect for spelling issue.

Go to Editor Options for editor issue.

Make sure that the “Typing replace selected text” option is selected and that the correct language is chosen. You can also review and edit the list of AutoCorrect entries in the “AutoCorrect Options” section.

Go to File>Options > Mail and select Editor Options. Select ProofingAutoCorrect Options. On the AutoCorrecttab, select or clear Replace text as you type.

2. Disable third-party add-ins: Sometimes third-party add-ins can interfere with AutoCorrect. To disable them, go to File > Options > Add-Ins. In the “Manage” dropdown, select “COM Add-ins” and click “Go”. Clear the checkboxes next to any third-party add-ins and click “OK”.

3. Repair your Office installation: If the issue persists, try repairing your Office installation. Go to Control Panel > Programs and Features, select Microsoft Office, and click “Change”. Choose the “Repair” option and follow the prompts.

4. Disable Exchange cache by going to File>Account Settings>Change.

5. Run Outlook.exe /safe for a test.

6. Repair the PST File.

  • First, open your Outlook folder in File Explorer.
  • That folder path could be this one on 64-bit Windows:Program Files(x86)/Microsoft/OfficerootOffice
  • Or this one on 32-bit platforms:Program Files/Microsoft/OfficerootOffice
  • Then click the scanpst.exe to open the Outlook Inbox Repair Tool window.
  • Press the Browsebutton to select your PST file.
  • Enter Outlook.pst in the Windows search bar if you’re not sure what folder the PST file is in.
  • Click the Startbutton on the Outlook Inbox Repair Tool window to fix the PST file.

6. Reset your Outlook settings: As a last resort, you can try resetting your Outlook settings. Note that this will reset all Outlook options to their default values. To do this, close Outlook and navigate to %LOCALAPPDATA%\Microsoft\Outlook. Rename the Outlook.xml file to Outlook.xml.old and restart Outlook.

Fixing Microsoft system center Failed to send notification using server/device Resolution state: Closed

The error message “Failed to send notification using server/device Resolution state: Closed” suggests that the System Center was unable to send a notification to a server or device due to a closed resolution state.

There are a few steps you can take to troubleshoot and resolve this issue:

  1. Check the notification settings: Ensure that the notification settings are configured correctly in the System Center. Check if the notification channel is set up properly and if the server/device is correctly identified.
  2. Verify server/device connectivity: Verify if the server/device is reachable from the System Center. Check if there are any network or firewall issues preventing the System Center from connecting to the server/device.
  3. Check the resolution state: The error message indicates that the resolution state is closed. Check if the issue that triggered the notification has been resolved. If the resolution state is closed, the System Center will not send any further notifications.
  4. Restart the System Center services: Try restarting the System Center services to see if it resolves the issue. This can sometimes clear any temporary issues that might be causing the notification failure.
  5. Review logs: Review the System Center logs for any errors or warnings that might be related to the notification failure. This can help identify the root cause of the issue.

If these steps do not resolve the issue, you may need to contact Microsoft support for further assistance.

DUO Authentication failed error because of Location Unknown and No Response

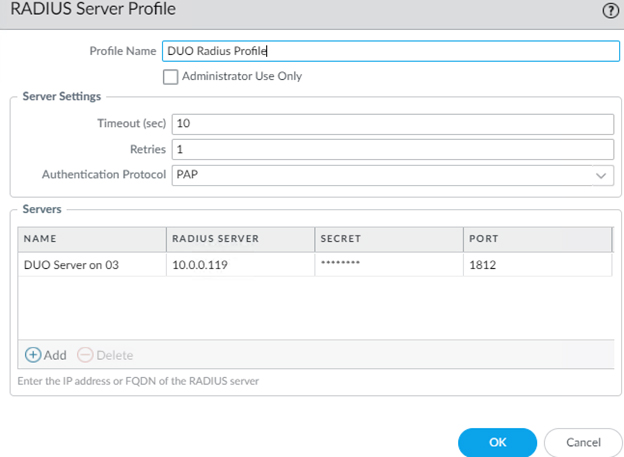
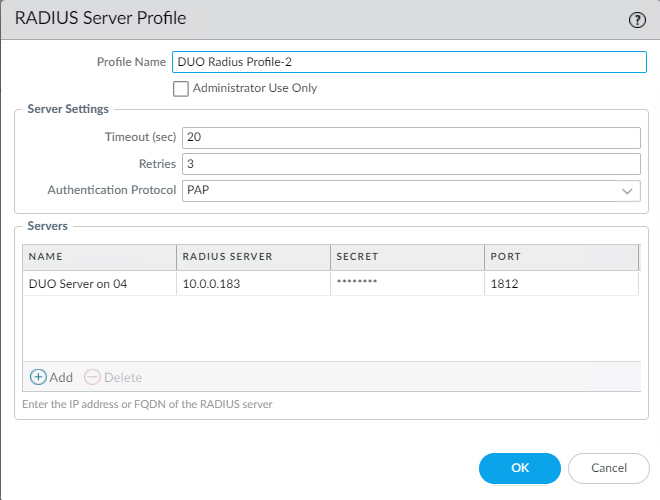
Situation: One of our users can’t login GloablProtect and gets DUO Authentication failed error.

Troubleshooting: When we check the user logs, we see Location Unknown and No Response.

Case 1: It sounds to me like you may have changed some device settings with your Android phone that caused the Duo Mobile app to deactivate, and you should be able to authenticate again once you follow the steps to reactivate the app.

Case 2: I have the same problem after disabling the account of DUO-PROTECTED  on the DUO app.